Navigating the Frigidaire Refrigerator Recall: What You Need to Know

An Inside Look: Understanding the Frigidaire Recall

Understanding Recalls: What They Are and What Happens


Before delving into the specifics of the Frigidaire refrigerator recall, it's essential to understand what a recall entails and the processes involved. A recall occurs when a manufacturer or regulatory authority determines that a product poses a safety risk or fails to meet regulatory standards. This action is taken to protect consumers from potential harm and ensure the integrity of the product.


Recalls can be initiated for various reasons, including defects in design or manufacturing, safety concerns, or failure to meet regulatory requirements. In the case of appliances like refrigerators, recalls may be issued due to issues with components such as ice makers, electrical systems, or structural integrity.


When a recall is initiated, the manufacturer typically works with relevant regulatory agencies to notify consumers of the issue and provide instructions on how to address it. This often involves contacting affected consumers directly, issuing public announcements through various channels, and coordinating efforts to repair or replace the affected products.


For consumers, being informed about recalls is crucial for your safety and well-being. It allows you to take appropriate actions to mitigate risks and ensure the continued safe use of your appliances. In the case of the Frigidaire refrigerator recall, understanding the nature of the issue and how to respond is essential for protecting both individuals and families from potential harm.


Recall Announcement: Frigidaire Refrigerator Recall


In February of 2024, Frigidaire issued a recall for nearly 400,000 refrigerators due to a critical issue with an ice bucket component. This recall affects Frigidaire's side-by-side refrigerators equipped with slim ice buckets, which were sold between November 2015 and September 2019. These refrigerators were distributed through major retailers such as Lowe's, Home Depot, Frigidaire.com, and other authorized dealers across the United States and Canada. The models ranged in price from 1,400 to $2,400.


Incidents and Previous Recalls


The recall was initiated due to a specific piece of plastic within the ice bucket assembly that is prone to breakage. This breakage can result in plastic fragments falling into the ice dispenser, posing a significant choking hazard and risk of laceration injuries, particularly to children. As of the current date, Frigidaire has received at least 343 reports of incidents related to this issue, prompting the comprehensive recall of all affected refrigerators sold within the specified time frame.


It is noteworthy that this is not the first instance of Electrolux, Frigidaire's parent company, recalling refrigerators due to issues with their ice makers. In 2022, over 370,000 Electrolux and Frigidaire refrigerators were recalled following nearly 200 reports of the ice-level arm breaking into pieces and falling into the ice bucket, posing choking hazards. These recalls affected various refrigerator models, including side-by-side, top-freezer, and French door configurations. The recurrence of such issues underscores concerns regarding the efficacy of the frost protection measures implemented by Frigidaire in their freezers.


What Can Consumers Do?


For consumers who may be unsure whether their refrigerator is affected by the recall, it is essential to perform a quick check. If you purchased a Frigidaire side-by-side refrigerator with a slim ice bucket between 2015 and 2019, and your model matches one of the following:


[DGHK2355TF, DGHX2655TF, FFSC2323TS, FGSC2335TD, FGSC2335TF, FGSS2635TD, FGSS2635TE, FGSS2635TF, FGSS2635TP, FPSC2277RF, FPSC2278UF, FPSS2677RF, LFSC2324VF, LGHK2336TD, LGHK2336TF, LGHX2636TD, LGHX2636TF]


It is recommended to cease using the ice maker immediately until the issue is resolved. Even if it hasn’t broken yet, there’s no guarantee that it won’t if the model numbers match. 


Taking Action


Affected consumers are encouraged to contact Frigidaire or the Electrolux Group to request a free replacement of the defective ice bucket assembly piece. Additionally, individuals may wish to explore options regarding a potential class-action lawsuit. Schmidt Law is currently in the early stages of organizing such a lawsuit.


Prioritizing Safety: Appliance Rescue Service

At Appliance Rescue Service, we prioritize the safety of your home and family. Whether it's addressing broken appliances or informing you about critical recalls like this one, we are dedicated to ensuring your peace of mind. We understand that appliance issues can arise for various reasons, not just due to faulty components. If your appliances break or malfunction, regardless of the cause, we're here to help.

Please visit our website or contact us at (214) 599-0055 today to schedule a maintenance appointment for your appliances. Our team will work with you to set up a convenient date and time that fits your schedule. With our expertise and dedication to quality service, you can trust us to keep your appliances running smoothly and your home safe.


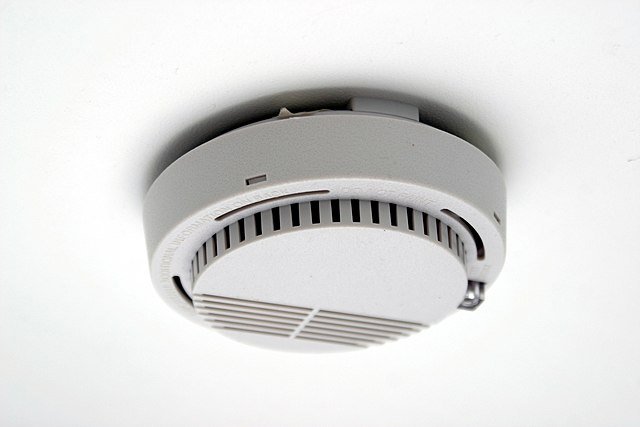

Smoke Detector Checks: A Vital Winter Checklist

Unseen Guardians: Winter-Proofing Your Home Against Silent Threats

It's the holiday season, and that means, for us up here in the northern hemisphere, it's also the coldest part of the year. Heaters are turned on, people are bundled up in blankets and coats, and everyone is probably feeling a little drowsy with the sun rising later and setting earlier. But, it isn't all snow and hot cocoa - heaters, especially those using gas, present a twofold danger if they ever malfunction. We are, of course, talking about fire and carbon monoxide. 

Your house does have detectors, but there is no time like the present to make sure that those detectors are good to protect yourself and your family during the winter. So, what are the differences between smoke and CO detectors, what does each warn you of, and how can we make sure that our detectors warn us the moment there is danger?
Now, you may be asking, “aren't smoke detectors and carbon monoxide detectors the same thing?” and this is a perfectly valid question. Both are designed to tell you of a danger to your breathing, and warn you before it gets to a serious level. But, they warn you of two very different dangers that can be presented in the home.


Our first stop should be a quick familiarization on the danger here. For the uninitiated, carbon monoxide, or CO, is an invisible and odorless gas that is extremely dangerous to the human body. It is very commonly found as a byproduct of gas burning devices, such as water heaters, gas ovens, and most prevalent during the winter, any gas heating devices for your home. Now, most devices that use gas to generate heat have excellent methods of ensuring that no CO escapes into your home during operation. However, these devices can be damaged, be that by natural wear and tear or by some other means. Even a small leak in the exhaust of a gas oven can prove dangerous for the occupants of a home, so it is incredibly important to make sure that the people inside the home are kept safe.

Smoke presents a more obvious danger, as it is very visible, though the danger is similarly found in the risk of breathing it in. Thankfully, smoke is not present unless there is a fire somewhere in your home. But, the risk is still present - especially with heat sources in the home that may not have been on since last winter.

Of course, with either threat, safety is most easily found by keeping your detectors up-to-date and well-maintained. Due to the differences in design, though, your smoke detectors and your CO detectors have a few differences in their maintenance. We have a few tips for you to follow with either one, that way you can make sure your home and your family are protected in case of a fire, or a carbon monoxide leak.


Here are a few tips for you to remember with your CO detectors:

  • Keep them clean! Using a dry cloth to wipe any dust from the detector is an excellent way to make sure that they're able to detect the gas without being choked up by household dust.

  • Replace your batteries! As a device that is constantly on to constantly be on guard, the batteries in your CO detector can run out over time. Typically, it is advised that you should swap batteries twice a year. We advise, if you haven't had a chance to change batteries in a while, make sure to do so now so that you're in the best posture for safety.

  • Check their age! Like regular smoke detectors, CO detectors have components that begin degrading over time. Most devices have a lifespan of five years, and a device expiry date should be somewhere on the device. A good rule of thumb on this - if you can't remember when the device was installed, and you can't find a date on it, it's best to go ahead and have it replaced.

  • Make sure you can hear them! Carbon Monoxide detectors should always be in areas where you can easily hear the alarms - especially if you're sleeping when they go off. The greatest risk of CO poisoning comes when you are asleep. So, make sure the detectors are capable of waking you up so that they can keep you safe in case you have a dangerous leak in the home.


And here are some important tips to remember for your smoke detectors.

  • Cleaning is universal! Making sure your smoke detectors are clean of dust works pretty much the same as your CO detectors, so follow the same instructions we mentioned above and you should be golden.

  • Batteries are vital! Your smoke detectors may be hard-wired, but even then, you will still have battery backups. Regardless of what type of detector you have, you should swap batteries at least once a year.

  • Test them! Take some time to use the test function on your detectors. There should be a little button on the front, so try to go through and hit every detector in the home to make sure they are all functioning correctly. It is recommended that you do this once a month.

  • Check the age! Just like your CO detectors, smoke detectors have a certain limit to how long they can function correctly. Most smoke detectors last ten years, but it is always best to check your detector to make sure they are still in their functional years. If they are getting particularly old, it never hurts to replace them a little early.

As we revel in the joyous moments of the winter season, let's not overlook the essential guardians of our homes – the smoke and carbon monoxide detectors. Keeping these sentinels in pristine condition is not just a winter chore but a year-round responsibility for safeguarding our loved ones. At Appliance Rescue Service, while our focus is on maintaining and repairing major appliances, we understand the importance of every aspect that ensures your family's well-being. As you prepare for the winter season, trust us to handle the upkeep of your appliances, allowing you to focus on what truly matters – the comfort and security of your home. Visit our website or give us a call ((214) 599-0055) today to schedule an appointment. Let our dedicated team at ARS keep your household appliances in top shape, ensuring a cozy and worry-free winter for you and your loved ones.


Additional Reading


Why Is My Oven Making Weird Noises 

Halloween Horrors In Your Home?

10 Kitchen Hazards to Avoid this Holiday Season


Staying Safe During A Heatwave

Or "How To Survive Summer In Texas."

What do you need to do to take care of yourself and your loved ones during a heatwave? Every year people struggle as the temperatures climb higher, and we dream of when winter will come. There are ways to take care of yourself and your loved ones and make the summer heat bearable, if not enjoyable. These are as much about taking care of your home as taking care of yourself and proper precautions against the temperatures. 

A burning sun looks across cracked, parched land. The sky is the color of fire with dark sooty clouds streaking across it.

Courtesy of Blende12


Be Smart Dealing With Heat

` Know when to get a cool shower or hop in the pool to cool off and prevent overheating


Keep Your AC System Working Right.

Ideally, like many other things we've discussed on ARS, you'll have your air conditioning system checked yearly. This can be at the beginning of Summer or come winter. But either way, you want to get it checked and serviced consistently; this way, it doesn't fail in the middle of summer. This includes ensuring that the filters are cleaned regularly, that the units are secure, installed the weather stripping is in good shape, and the part of the unit outside the window isn't clogged up with debris if you have a central AC system. You want to vacuum the dust from the registers and trim vegetation around your outdoor condenser to at least a 2 ft circle around it, in addition to having a professional look at it yearly.


Be Smart When Using A Ceiling Fan.

A five bladed ceiling fan hangs from a ceiling that looks like it's in a tower of some sort.

Courtesy of Funeyes

A ceiling fan is great for keeping cold air moving and increases how fast your sweat evaporates from your skin. Unfortunately, it's not something you can rely on by itself when temperatures have reached the upper 90s.


 Change Up Your Wardrobe

Your wardrobe should reflect not just your personality but also the temperatures around you. by having options that you can switch in and out paste on whether you're better prepared to not melt under the Texas Sun. this should be evident to many of us. Yet, you hear about people passing out because they weren't prepared every year. So ditch the polyester. Transition your wardrobe to cottons, linens, and fabrics that allow your skin to breathe and for air to move around you and keep you cool.


Stay Hydrated!

 We know staying hydrated isn't the easiest thing. You're constantly on the go, and plain water is boring for most people. And as you get older, water might not even taste that great; fortunately, there are several different ways that you can get around this without adding sugars or sodas or energy drinks to your diet, all of which are going to dehydrate you rather than keeping you hydrated.

Add fruit to your water. 

 Adding fruit to your water is one of the best things if your issue is flavor. strawberries, lemons, limes, cherries, oranges, and watermelons. (We believe mint should also be on this list, but sadly it is not a fruit .) 

Three mason jars with straws in them hold smoothies, with color coordinated straws. Limes, tangerines, raspberries, pears and grapefruit are scattered around the bottles on a wooden table.

Courtesy of Silviarita

Add fruits and vegetables to your diet, such as watermelon, strawberries, celery, spinach, and cooked squash. These are amazing options to get more water into your diet without feeling like you're having to chug gallons upon gallons of water. All of them are roughly 90% water, so adding them to your diet, even a fistful here and there throughout the day, means you're taking care of yourself.

Try a smoothie

If you absolutely cannot stand that last option, take some of those and turn them into a smoothie instead. We'll cover a couple of different smoothie options later this month for how to work that into your diet without having to take on a ton of sugar.

Sunscreen Is Amazing

Two hands cupped together, one is holding a bottle of sunscreen and depositing it into the other.

Courtesy of AdoreBeautyNZ

Every year, a slew of articles talk about the importance of wearing sunscreen and how not doing so can cause wrinkles, age spots, and cancer. At this point, most of us have accepted this as fact, yet many choose to still forego putting it on. Even if you choose to go with a "you only live once" mentality, we can all agree that sunburns suck. Even more importantly, getting a sunburn brings you closer to getting sick from the heat. To avoid both of these things, put on 50 SPF sunscreen before you go out for the day. Throw it on your face, your hands, your shoulders, whatever is exposed, and you're good. If you want more in-depth discussion and research, we advise checking out this great article from two dermatologists over on GoodRx.

Check The Heat And Humidity Daily

A red wooden barometer shows guages for the temperature in celsius as well as a barometer showing what the weather will  be

Courtesy of Stevepb

We're not saying that it has to be the first thing you do in the morning, but eating breakfast or getting dressed for the day would be a good time not only to check the high for the day but also the humidity index. How humid the day will be will directly impact how hot you feel, and it can even affect how well you can breathe, depending on how high the humidity is. Much like during winter, you'll see a wind chill of 30 degrees; during the summer, the temperature can be only in the 90s, but that humidity makes it feel like you're well over a hundred and five.

Keep an eye on those at higher risk end know what higher risk means.

Know The Signs Of Heat Illness

Signs of heat illness, according to the CDC, include:

 a high body temperature of 103 degrees or higher

Hot red dry, or damp skin

Headache

Fast, strong pulse

Dizziness

Nausea

Confusion

Losing consciousness 

Two people on the left, struggle to cool off. Two people on the right are dizzy and ill from the heat.

Courtesy of RoadLight

These are the signs related to heat stroke specifically. If you or someone near you is experiencing these symptoms, get them inside or under air conditioning immediately end call 911. Do not, give them anything to drink as that can be dangerous at the stage.


We hope that these tips help you in dealing with the heat this summer and that you stay safe whether you're here or traveling. If you have any tips or tricks for dealing with the summer heat we missed, let us know in the comments below or over on our Facebook page.


If your appliances are the ones having trouble with the summer heat and aren't working quite right, that's where we come in. you can reach out to us at ((214) 599-0055) or by going to our contact page. We'll work with you to find a time that suits your schedule and send one of our techs out to solve your appliance problems.

Tornado Prepping Time!

What do you need to know and have to prepare yourself in the event of a tornado?

Table of Contents

Preparing Your Home

Preparing Your Property

Preparing Yourself 

A storm super cell spiraling above a field, with rain to the left.

It’s May and officially tornado season! Although we’re not hoping to run into any, we have to acknowledge the possibility. So, we’re doing what we do best and preparing in advance both our homes, and yours. We’ll look at how to prepare your home, your property, and your family. 

Preparing Your Home 

To start with you want to prepare your home. This should ideally be done long before there is any potential for tornados. So, if you’re reading this and you’re under a tornado watch? That’s not the best time to be doing this. Two weeks ago? That would be the best time. Or this weekend. That works too. Far better late than never. 

Check shutters and doors  - During a storm that can create tornados, you’re dealing with high winds. Your windows and doors are the biggest potential points for debris to make its way into your home, in which case the air outside is going to attempt to make the air inside your home equal to it in pressure. The short answer here is to make sure that your shutters and doors are solid and in good repair. For windows, you might consider getting storm shutters that can withstand high winds and hail. For your doors,  you want to make sure that they have at least three hinges and a door plate secured with 1-inch screws (at minimum.)  

**An important note. There is a myth that leaving your windows open during a storm will prevent your home from suffering damage as it will ‘equalize’ the pressure between the inside an out. This isn’t true. We must stress that doing something like this is going to end with your house being ripped in half. Close your windows and doors tight, make sure they’re covered if you can, and ignore myths like this.**

Check gutters - Your gutters are not the end of the world if you lose them during a storm. What is more of a problem is if they come off and go through a window. Is it common? No. Has it happened? Yes. Can you minimize the possibility of it happening by making sure they’re securely attached to your house? Yup. 

Which room is your safest? - Go through your house and figure out which is the most central and best protected. Ideally, your best bet is going to be something that is either below ground (like a basement) or on your first floor. You want to make sure that the room has as few windows as possible. Finally, if possible, your safe room should be at the center of your home, preferably not sharing an external wall. 

Secure tall furniture - Tall furniture getting knocked over is not only a danger to the furniture but also to you or your pets. Better to go around your home and secure everything with L brackets or straps now and avoid it altogether. Bookcases, china cabinets, entertainment centers, make sure everything that can be secured, is. 

Obtain straps for your appliances- This is one that doesn’t have to be done until you’re actually under a tornado watch, but having the straps there and ready to go is what matters. 

Cut materials for windows - This is another one of the “Do it well in advance” things. You’ll want to cut plywood or plexiglass. One thing we don’t suggest is ‘hurricane film’, at least not when used by itself. While the film will help keep your windows from shattering due to debris, it won’t stop the winds from blowing the window right out of the frame. 

When you’ve decided on your material of choice, we’ll suggest that you measure it so that it sets into the frame of the window in question and that you secure it with long screws. Once you’ve drilled the holes, label which side of the material is top, and tape the screws to it. Store all of them together in a cool dry place that’s easily accessible. 

A wall cloud over a city, with lightning striking down

Preparing Your Property

Preparing your property is something that should both be done ‘all the time’ and also once the season starts. 

Thin your trees - Trim dead branches, get rid of any low-hanging branches that are too close to windows or the roof, etc. 

Shape your trees- For this you might need to bring in a professional. The idea though is for the weight of tree being away from your house so that if it falls, it falls away rather than towards your house. 

Reinforce garage and or shed doors- Just like with the doors to your home, you want to make sure that your doors to your garage or shed are solid and reinforced so that they aren’t going to get blown off. The garage door is one of the most common points for debris to come flying through during a storm. 

Make a plan for your outdoor furniture. - Make a list of where everything can be stored that needs to be taken in. Patio furniture, pool items, grills, plants, everything. By having a list of what needs to be moved in the event of a tornado watch, you’re in better condition not to leave anything out accidentally.  

Anchor propane tanks outside- Your propane tanks on the other hand need to stay outside and be securely strapped down. 

Clean up or store away any heavy debris outside- When you get a tornado watch, this is one of the things you need to do. Go around your property and store away anything you can. We’re not talking about the things that are normally outside. Instead this is the wood project you’re in the middle of, or the garden you’re planting, the bricks you’ve just got in for a walkway etc. 


Preparing Yourself 

Last but not least, you need to make sure that you are prepared to wait out a tornado watch or, heaven forbid, a tornado warning. All of these should be done ahead of time, and checked regularly to ensure nothing has gone off. 

Stock your safe room - Back in the first section you identified which room in your home would work best for a safe room. Now you want to make sure that it’s soft, comfortable and that you and your family can stay there for however long you might need to.  In addition to the list suggested here, we advise keeping the room stocked with portable chargers, a generator, cards, books, and other methods of entertainment. One of the worst things is to be in a safe room for an undetermined amount of time, and being nervous or upset. Having things to keep your mind off the situation is always a great help. We also advise a crank charging radio, to ensure that you can keep apprised of the weather. 

Build kits for your car and as grab-and-go options if your saferoom isn’t an option for some reason. -  These kits should include simplified versions of what you keep in your saferoom. 

Include a kit for any pets - Your pets cannot look out for themselves, nor can they pack an emergency kit, so you should consider what they might need and what might keep them calm under the circumstances. 

Make sure to have all of your important documents- Birth records, death records, marriage certificates, deeds to property, proof of insurance, tax paperwork. If someone has asked for it at some point, you want to make sure that you have it in a secure place. You should also include a list of all of the serial numbers for your electronics, just in case you have to leave and people decide to… help themselves while you’re away. Ideally that would be in your saferoom, but it could also be in an easy-to-grab attache or safebox. 

Check your home and auto insurance - This can be done at any point prior to a tornado warning. It’s best though that if you do live in an area that frequently has tornados to consider having this on your policies. 

Did we miss anything? What do you keep in your safe room in case of a tornado? What about your go-bags? Let us know in the comments below or over on our Facebook page. As always, we love to learn from you! 


If you ended up on our blog because your dryer is rattling and not because of a mini cyclone inside of it, you’re still in the right place. You can reach out to us at ((214) 599-0055) or via our contact page to set up an appointment that works for you. We’ll help you find a time when one of our professionals can come and take a look at your major appliances and get them back to running smoothly.  

When and How to Winterize Your Home’s Pipes

And Why You Should Bother, Even in Texas


It’s not quite winter yet, although many of us are dreaming of it. That does mean that it’s the perfect time to winterize your pipes if you haven’t already though. We’re taking a look this week at what that means (because your blogger didn’t know prior to this week), why you should bother, and what that looks like. Let’s dig in. 


What does winterizing pipes mean? 

Winterizing your pipes means going through the steps of getting them ready for winter and freezing temperatures. Whether the temperatures are that low just overnight or for long weeks at a time, your pipes, and home, need to be protected.  Fortunately there are plenty of things that you can do to achieve just that. 


Why should you winterize your pipes in Texas?

Let’s start by reminding everyone of last February. 2 weeks of ice and snow, power outages and all of us going “But this is Texas!” 

Aside from the curveballs that Mother Nature likes to throw at us, there are still reasons to winterize your pipes. It might only get below freezing at night, but a few hours of that is still enough to cause damage.  While the worst case scenario is that you have your pipes burst and your home floods, there are other things that can happen. You can have cracks begin to form in the pipes that are going to seep during the summer into your foundation. 

We will say that while it’s necessary to winter your outdoor pipes, you can be more choosy about which of your indoor pipes to do the same to. 

Image by Tim Pierce on Flickr of a broken and frozen water pipe. This is what happens when you don’t winterize your pipes! :D


When is the best time to winterize your pipes?

The best time to winterize your pipes is before the first hard freeze. So… now would be a good time. Or maybe this weekend after you’ve slept off your Thanksgiving nap. Alternatively, you can push it out till the weather is staying in the 50-55*F range during the day. 


How do you winterize your pipes?

When it comes to winterizing your pipes, there are two ways you can go about it.  You can winterize your pipes for a long vacancy (say if you’re going away on a trip for Christmas) or for several months. Alternatively, you can do a ‘general’ winterizing for your home if you plan on staying in town all winter. 


If you’re going out of town for a Long Vacancy

Start by shutting off the main water valve, all water pumps and water heaters. You might question that last one, but think about leaving a pot on the stove with no water in it. The same thing can happen to your water heater. 

Now open all of your drain valves and taps. Start by making a list and check it as you go through the house. Make sure to check it twice in true Christmas spirit and check off each valve and tap as you go through the house. 

Go through all of the pipes and using an air compressor, blow out any remaining water. You know how if you turn off a hose during the summer it will still have some water in the pipe until it either evaporates or you hang the hose up? Same concept here, except its winter, so the evaporation is going to take a long time and you can’t hang up the pipes for your house. Better to blow them out rather than risk them having water freeze in the bends. 

Next, go to the drain valve for your hot water tank. Check to see if that is a floor valve or if it hooks to another pipe. If it is a floor valve you’ll need to run a hose from the valve to say your nearest sink, this way it doesn’t empty onto the floor. Now open it up and drain it completely.
Go ahead and empty all the water from the holding tank next. This is especially important if it’s a holding tank with a rubber diaphragm.
For extra safety, you might consider adding a small amount of antifreeze to the jet pump case.
Going back through the house, flush all of your toilets. You want to try and empty as much of the water from both the tanks and the bowls as possible. You won’t be able to get everything out, but you should be able to get the majority emptied. 


And you’re done with the inside of your home! Cross off your list, but make sure to hold on to it for when you get back so that you can reverse everything. 


Now let’s go outside.


Once again your going to start by shutting off the water supply valve. If new water can’t flow through, all you have to worry about is what’s left in the system.  Now disconnect any hoses or sprinklers and store them away for the winter. We like using racks in the garage for storing our hoses.
Once you’re back outside, turn all of the outdoor faucets on full and let them run. You want to keep them running until there is barely a trickle coming out, if anything. Now turn them all off and make sure to firmly close the valve.
As a final tip you might consider purchasing an insulated faucet cover. They look like a cow bell for the most part and use a string to stay firmly attached to the faucet and house.  Congrats! You’ve winterized the outside of your home as well! 


Some last general tips. 

Consider the insulation of your home. We’ve talked about the importance of it when you’re trying to keep your home cool, but it’s just as important for trying to keep your home warm. See if there are any crawl spaces over or under your home and if you can fill them or just better insulate them to keep cold air out. 

Take a look at your laundry room. Because they need to drain water out many laundry rooms are on the outside of the home, typically attached to our garages. They’re particularly vulnerable in these areas. Even just putting a door sock on the garage door can be a help in keeping the cold air from getting in. 

If you can, try to keep the heat on. The warmer the house is, the less likely it is that you’ll need to worry about the cold fingers of winter freezing your home’s plumbing. 


So that’s the process of winterizing your pipes. How much did you know before? Have you done it previously or is this your first year? Are you laughing that our blogger didn’t know how to winterize her home? Let us know over on our Facebook page and tell us if we missed anything! 


If you wound up here because your washer is damaged, we can help! All you need to do is call us at ((214) 599-0055) or reach out on our contact page. We at Appliance Rescue Service are here to help keep your home running smoothly.