Food

Feeding the Future: How 3D Printing is Revolutionizing the Food Industry

Printing Your Meal: A Glimpse into 3D Food Printing Technology

3D printing of food has been a topic of intrigue, a blend of culinary artistry and technological innovation. The concept revolves around transforming foods into paste or puree-like consistencies, which can then be meticulously printed with the same finesse as plastic filament. This remarkable capability opens doors to creating fantastical shapes, photorealistic cake toppers, or anything a chef's imagination can conjure. Yet, as with any groundbreaking technology, there are both awe-inspiring possibilities and potential drawbacks.


This article delves into the world of 3D food printing, exploring its current applications in the industry, fine-dining restaurants, and its potential to find a place in your home.

The Art and Science of 3D Food Printing

Jonathan Blutinger Creative Machines lab

3D printing of food is an automated process that extrudes pureed food onto a substrate. Analogous to layering plastics in 3D printing, the food industry is experimenting to achieve similar precision. However, the complexities of 3D food printing are evident. As of right now, examples of successful 3D-printed foods include purees, mousses, and chocolate ganache.


One of the challenges lies in the need to ensure the right texture and viscosity of the materials used in 3D food printing. Achieving the perfect consistency is essential for creating intricate designs and maintaining structural integrity during printing. However that has to be balanced against the food actually tasting appealing. 


Pioneers Shaping the Future


Leading the charge in 3D food printing are innovative companies like Redefine Meat, MeaTech, Aleph Farms, SavorEat, BeeHex, byFlow, Natural Machines, Print2Taste, and Remedy Health. These trailblazers are pushing the boundaries of what's possible in culinary creation.


Courtesy of 3d Sourced

Each of these companies brings a unique perspective to the world of 3D food printing. For example, Redefine Meat specializes in creating plant-based meat alternatives with 3D printing technology, aiming to revolutionize the meat industry. MeaTech focuses on lab-grown meat production, using 3D printing to create meat products that are sustainable and ethical. Aleph Farms is known for producing cultivated beef steaks with a 3D bioprinter, offering a solution to traditional meat production challenges.


A Taste of Innovation: 3D-Printed Dining


For those interested in experiencing the results of 3D food printing firsthand, a culinary adventure awaits. Restaurants like Food Ink, Melisse, La Enoteca, La Boscana, and Sushi Singularity incorporate 3D printing into their menus, offering guests an opportunity to savor this cutting-edge cuisine.


Courtesy of 3d Sourced

These restaurants have transformed dining into an immersive experience, where diners can witness the art of 3D food printing in action. From intricate appetizers to stunning desserts, these establishments demonstrate the creative possibilities of this technology. The fusion of technology and gastronomy elevates the dining experience to new heights, leaving patrons with unforgettable memories.


Empowering Dietary Needs

Beyond gourmet dining, 3D food printing is making strides in catering to special dietary needs. Companies like Biozoon are experimenting with creating easily chewable shapes from purees, providing nutritious and pain-free meal options for the elderly and individuals with dietary restrictions.


Courtesy of 3dSourced

Biozoon's approach offers a promising solution to a common challenge faced by the elderly: difficulty in consuming solid foods. By transforming traditional meals into easily chewable forms without compromising on nutrition, 3D food printing contributes to enhancing the quality of life for vulnerable populations.

Bringing 3D Printing Home


But what about the prospect of 3D printing food in your own kitchen? It's a tantalizing idea with some emerging possibilities. Companies like MyCuisini offer machines designed to 3D print chocolates, though this may not become a daily kitchen staple. In contrast, PancakeBot aimed to bring 3D-printed pancakes into homes, a concept that generated excitement but hasn't yet made it to the market. We hope to see changes regarding that in the future. 


As technology advances, we may see more accessible 3D food printers designed for home use. Imagine the convenience of crafting custom chocolate designs for special occasions or surprising loved ones with intricate pancake art at breakfast. These innovations have the potential to transform how we create and enjoy food at home.

Challenges and Possibilities

While 3D printing of food holds promise, it faces challenges, particularly in terms of speed. Printing even a small solid cube can be time-consuming, and for larger creations, patience is a must. Feeding a gathering with 3D-printed meals currently presents logistical challenges, but advancements are on the horizon.

As 3D food printing technology evolves, researchers and engineers are working to enhance printing speed and efficiency. Innovations in printing technology may soon enable the production of complex dishes more quickly, making it a viable option for larger gatherings and events.


A Vision for the Future

Looking ahead, the potential of 3D food printing is intriguing. Imagine scanning a design from a cookbook into your phone and recreating it effortlessly. Or recreating a special wedding cake design for an anniversary. While it's an entertaining technology with potential benefits for the food industry,  it may be more of a culinary enhancement than a kitchen necessity.

The future of 3D food printing holds exciting possibilities. As technology continues to advance, we may witness the integration of 3D printing with augmented reality (AR) and artificial intelligence (AI) in the culinary world. This could enable individuals to access a vast library of recipes and designs, transforming their culinary creations into works of art.

Exploring the Boundaries

As we ponder the possibilities of 3D food printing, we encourage you to envision its applications, not just at home but across various industries in the Greater Dallas metro area. Creativity knows no bounds, and collaboration can lead to remarkable innovations.

In the realm of healthcare, 3D food printing holds the potential to revolutionize nutrition for patients with specific dietary requirements. Hospitals and care facilities could use this technology to create customized meals that meet individual nutritional needs, enhancing patient care.

Join the Conversation


Do you have insights into the cutting edge of 3D food printing or questions about the ideas we've presented? Share your thoughts on our Facebook page.


Conclusion

While you might be wondering how an appliance repair company is connected to 3D food printing, rest assured, you're still in the right place. Appliance Rescue Service is the premier appliance repair service in the Dallas metro area, and whether it's your Bosch oven, or Sub-Zero refrigerator, we're here to ensure your home runs smoothly. Reach out to us via our contact page or by giving us a call at ((214) 599-0055), and our expert technicians will schedule a convenient time to diagnose and resolve any appliance issues you may have. At Appliance Rescue Service, our top priority is getting your home running smoothly again.

Additional Reading: 

New Appliances To Consider in 2023


Spicy Lemon Pepper Shrimp

A Bowl So Delicious You’ll Want To Eat It For All Three Meals

Sometimes you need something spicy. You need something that is going to be so tasty that everyone at the table will be left shocked. Sometimes, you stumble onto that recipe by accident. That’s what happened to us with this recipe.

Ingredients:

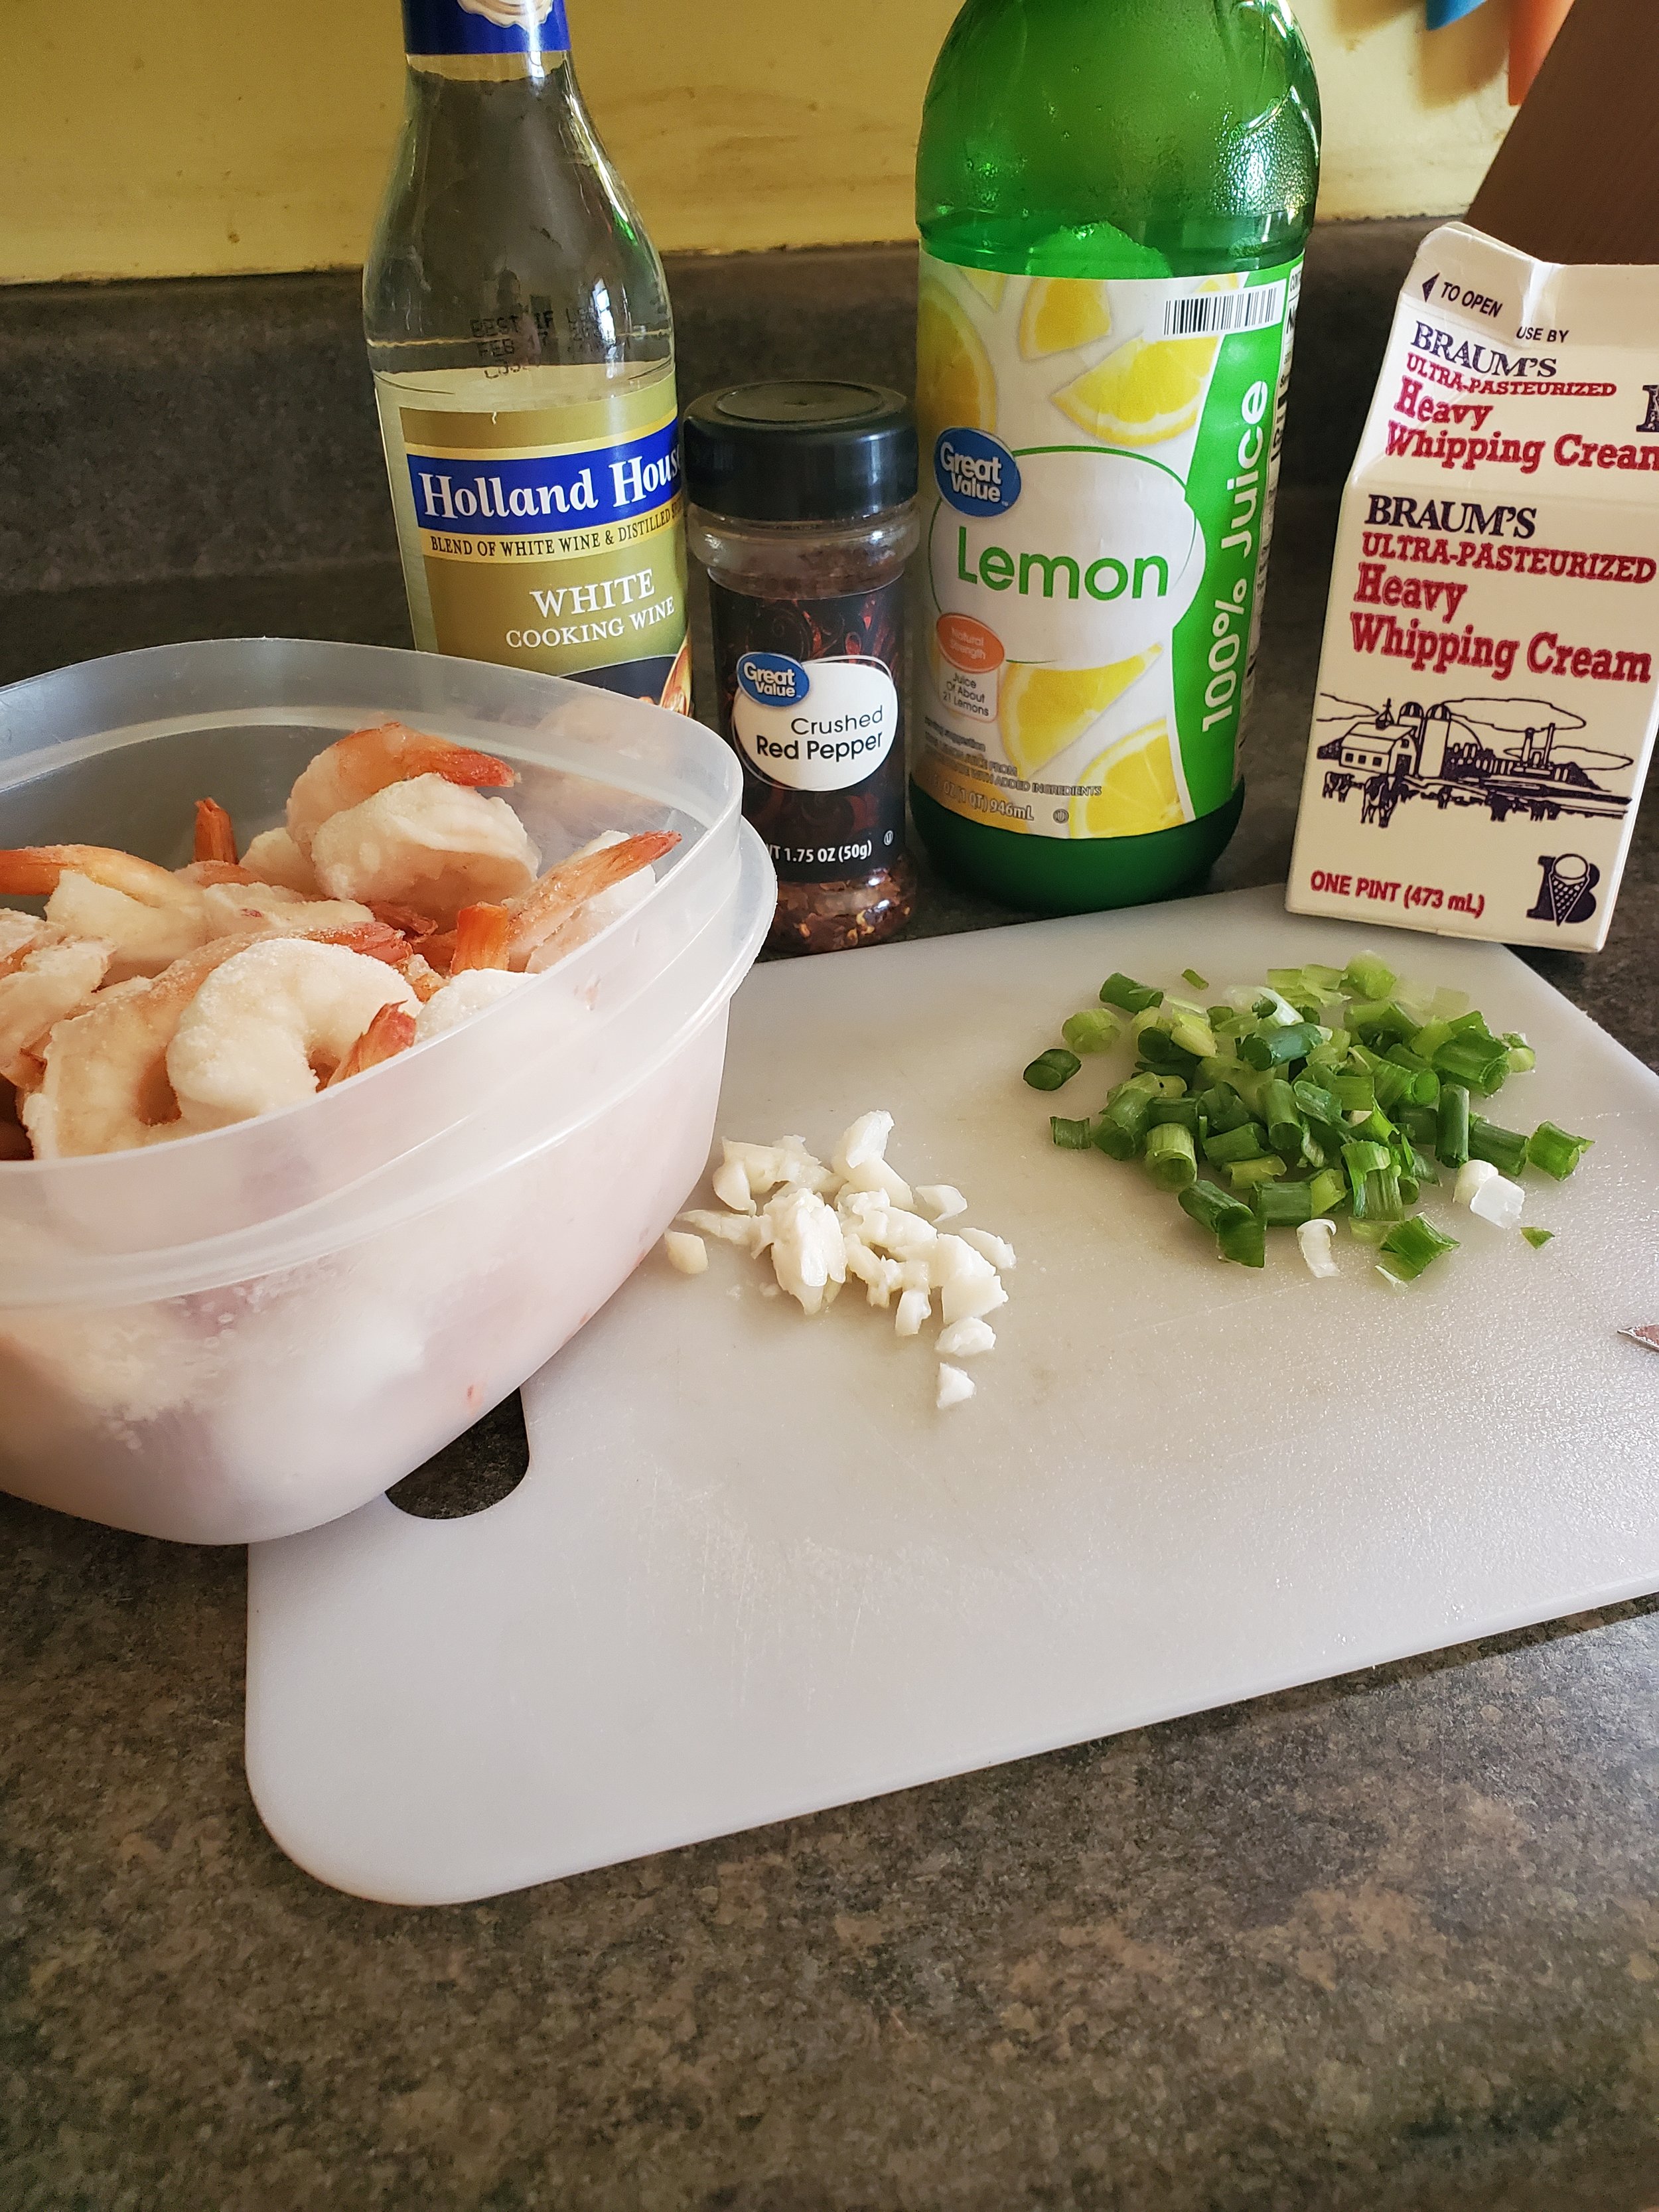
1 lb shrimp, peeled and deveined

1/4 cup white cooking wine

1/4 cup heavy cream

1 tablespoon lemon juice

1 tablespoon olive oil

1 tablespoon butter

2 scallions

2 cloves garlic

1 tablespoon crushed red pepper

1 teaspoon woodfired garlic seasoning (Kinder's brand)

salt and black pepper to taste

Tools:

cutting board

knife

large plastic container with lid

frying pan

measuring cups and spoons

spatula or tongs

Start with your shrimp. We like the pre-peeled frozen kind to cut down on the prep time, but if you don't mind the extra effort, starting with fresh is fine. Just keep in mind how quickly fresh seafood spoils. This is assuredly not a prep-ahead recipe.

Make sure you have your shrimp peeled, deveined, and rinsed. Set them into a large plastic container with a tight-fitting lid. Pour the lemon juice over them, then sprinkle with salt and pepper and woodfired garlic seasoning. Maybe shake in a little extra of that woodfired garlic (the stuff is addicting!). Put the lid on, check to make sure it's fully sealed, then give it a good shake to coat the shrimp.

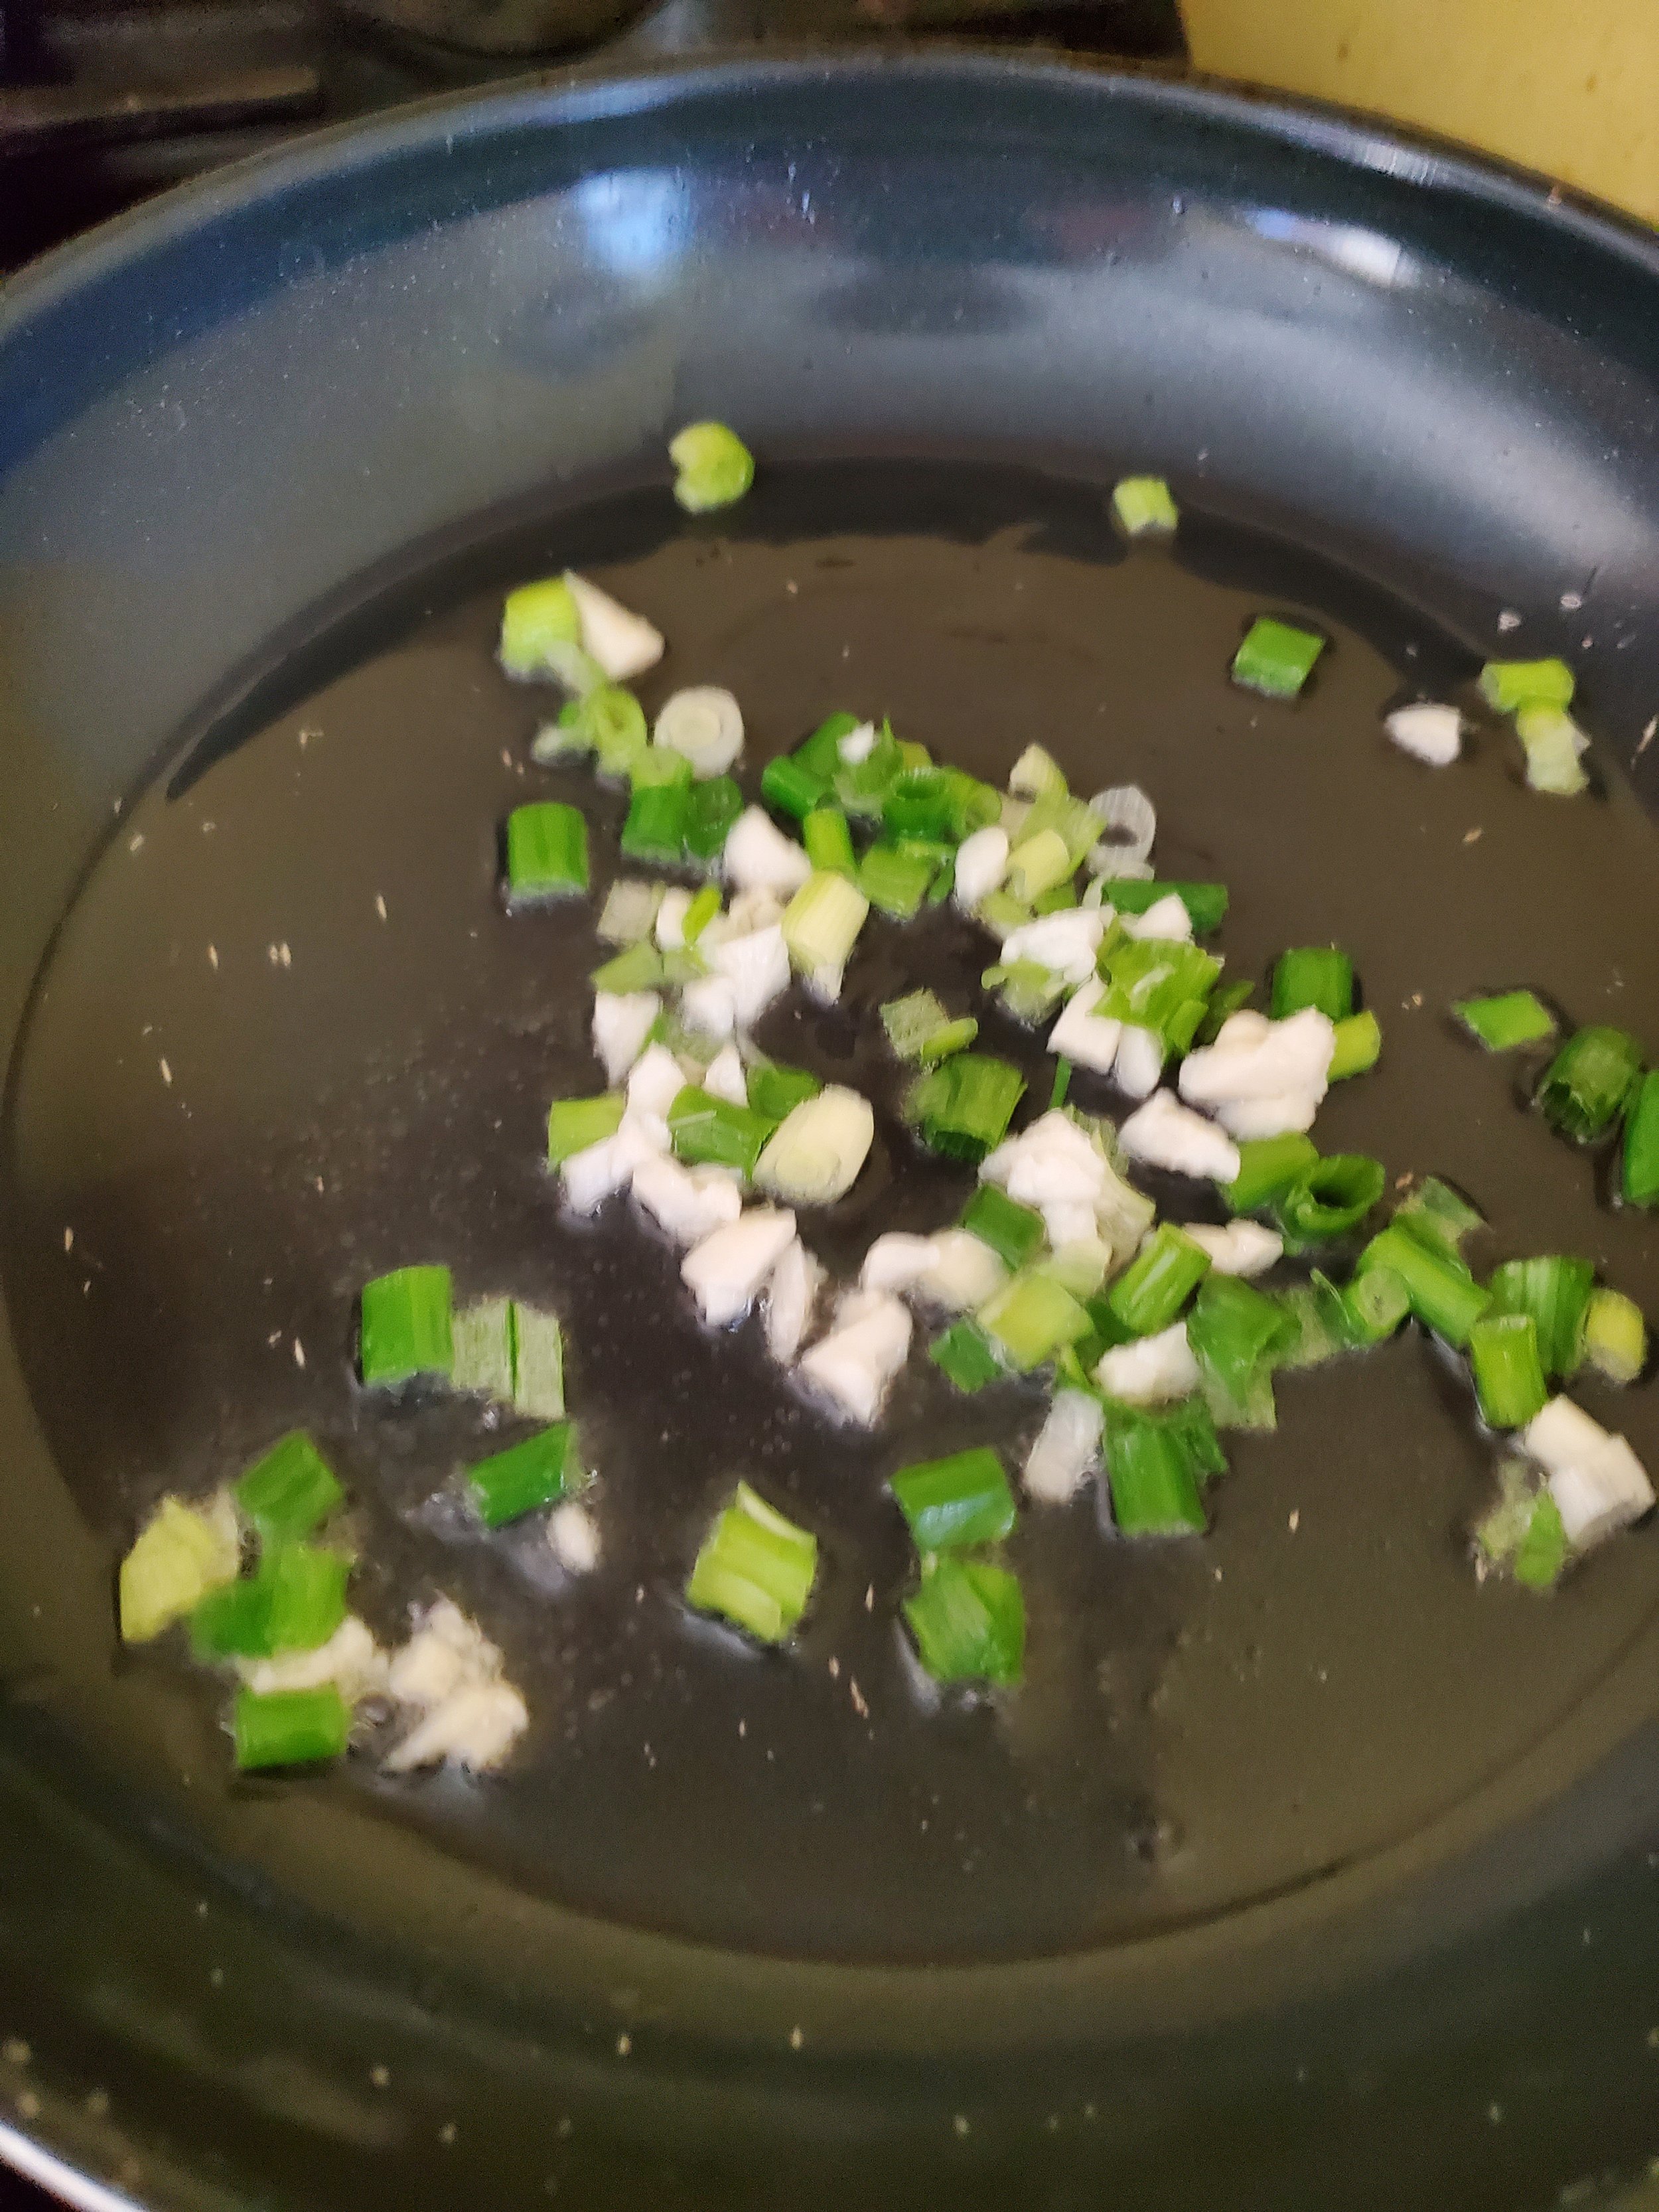
Wash your scallions, trim them up and chop them. We like to have pretty sizable chunks - but if there are picky eaters involved, feel free to cut them extra fine. Just adjust your cooking time to avoid torching them to a crisp if you do. 

Scrape the scallions to one side of the cutting board and, in your open space, use the flat of your knife to crush the two garlic cloves. Once they're flattened, go over them in a rough chop just to make sure no one gets a big mouthful of garlic later.

Melt your butter in the frying pan over medium heat. Add the olive oil, then dump the scallions and garlic into the pan. Give them a quick stir, then let them simmer there for a couple minutes until fragrant.

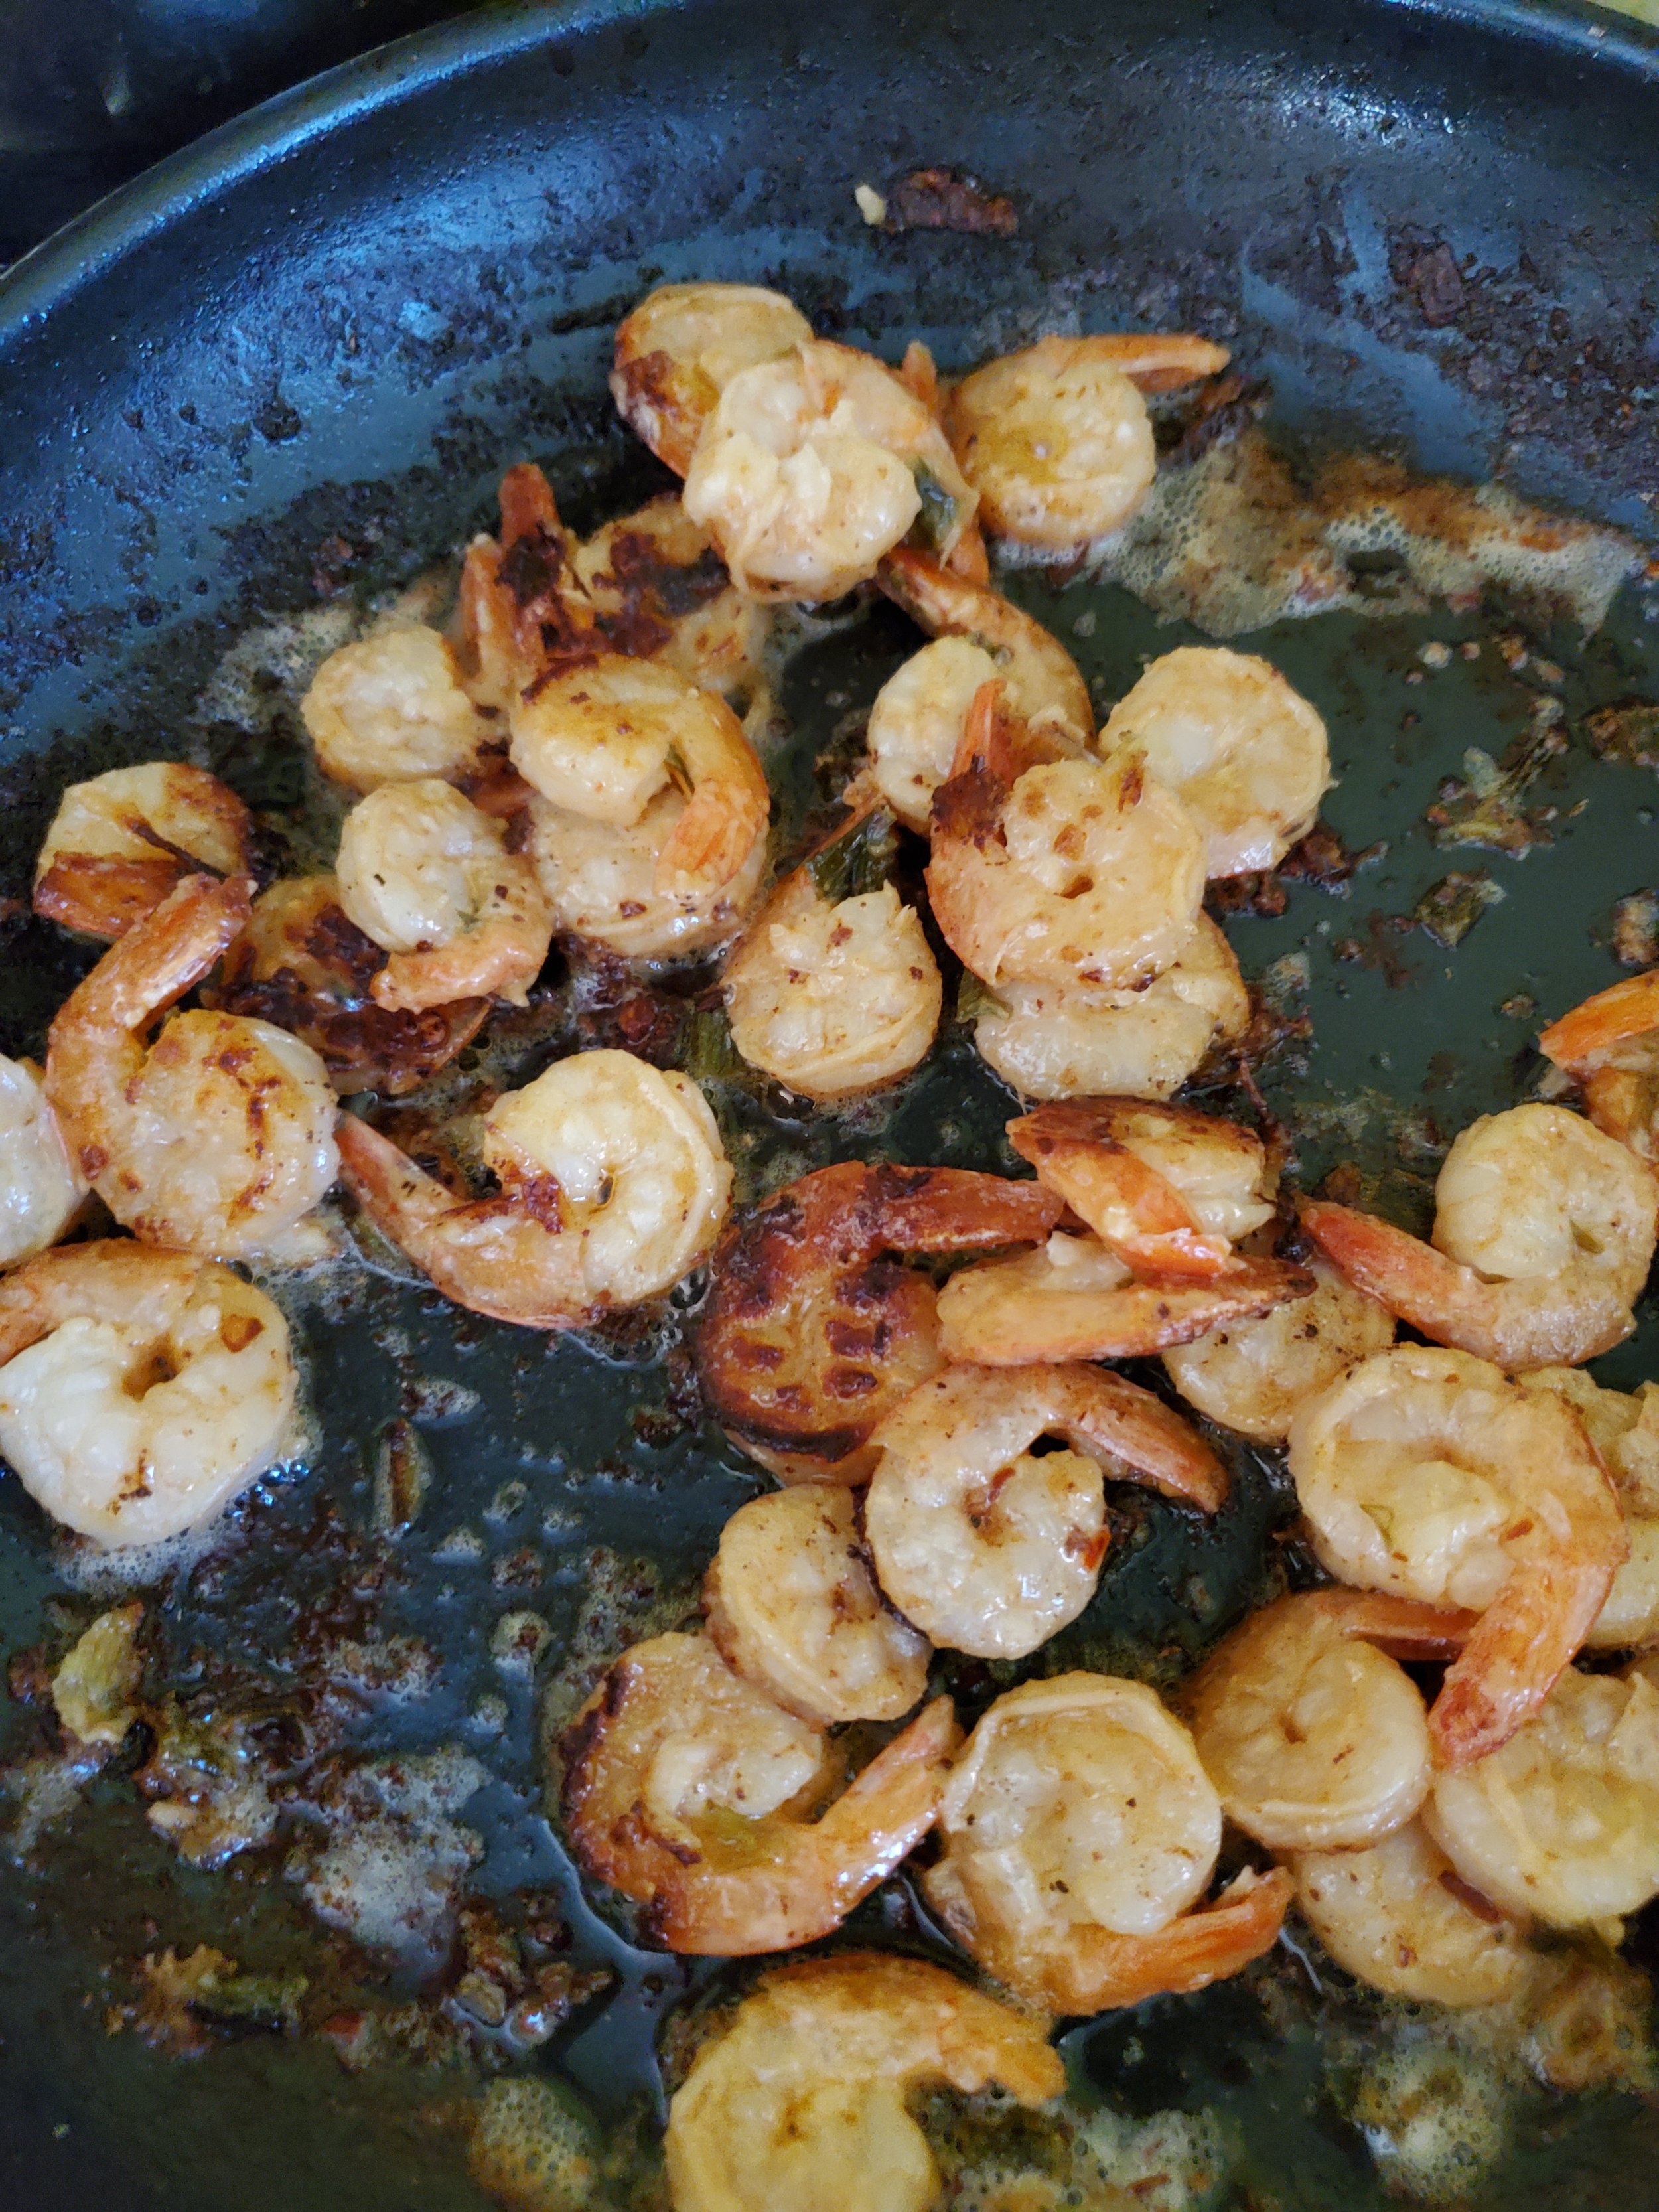
Turn your attention back to the shrimp. Double check the lid (no one wants to wear dinner), and then give them another good shake. Drain out most of the liquid and add the shrimp to the pan. Cook them for three or four minutes, then flip with a spatula or tongs. The "few minutes a side" guideline is very dependent on how large they are. We went for the medium-large shrimp. If you started with the smaller or even salad-size shrimp, reduce the cooking time by a bunch - they cook through so fast! 

Once the shrimp start turning colors (you'll know they're done when they're no longer sort of gray and translucent; a food thermometer should read 145 at the thickest point of the largest shrimp), measure out your white wine and add it to the pan. It will sizzle and pop, but it shouldn't flare. The alcohol content in a cooking wine is relatively low.

Let it reduce for a minute or so, then measure and add your heavy cream. Stir a bunch at this stage to be sure the cream is evenly distributed and there aren't any hot spots in the pan where the wine has already boiled away.

If there's anyone in the family who detests spicy food, this is the time to remove a little for them and put it aside. (Can you tell we have one of those, who also flinches at big pieces of onion or pepper?)

Sprinkle your crushed red pepper generously over the shrimp, give everything in the pan a good stir and a flip, and allow it to simmer another minute longer to let the flavors meld.

While it's totally optional, we like to turn the heat up a little at this step and get a good sear to complement the richness of the sauce. If the pan is looking a little dry, splash a little extra wine or cream into it before turning the heat up.

Split it up into even servings before you let anyone know it's ready - this meal sometimes gets fought over if you're not careful!

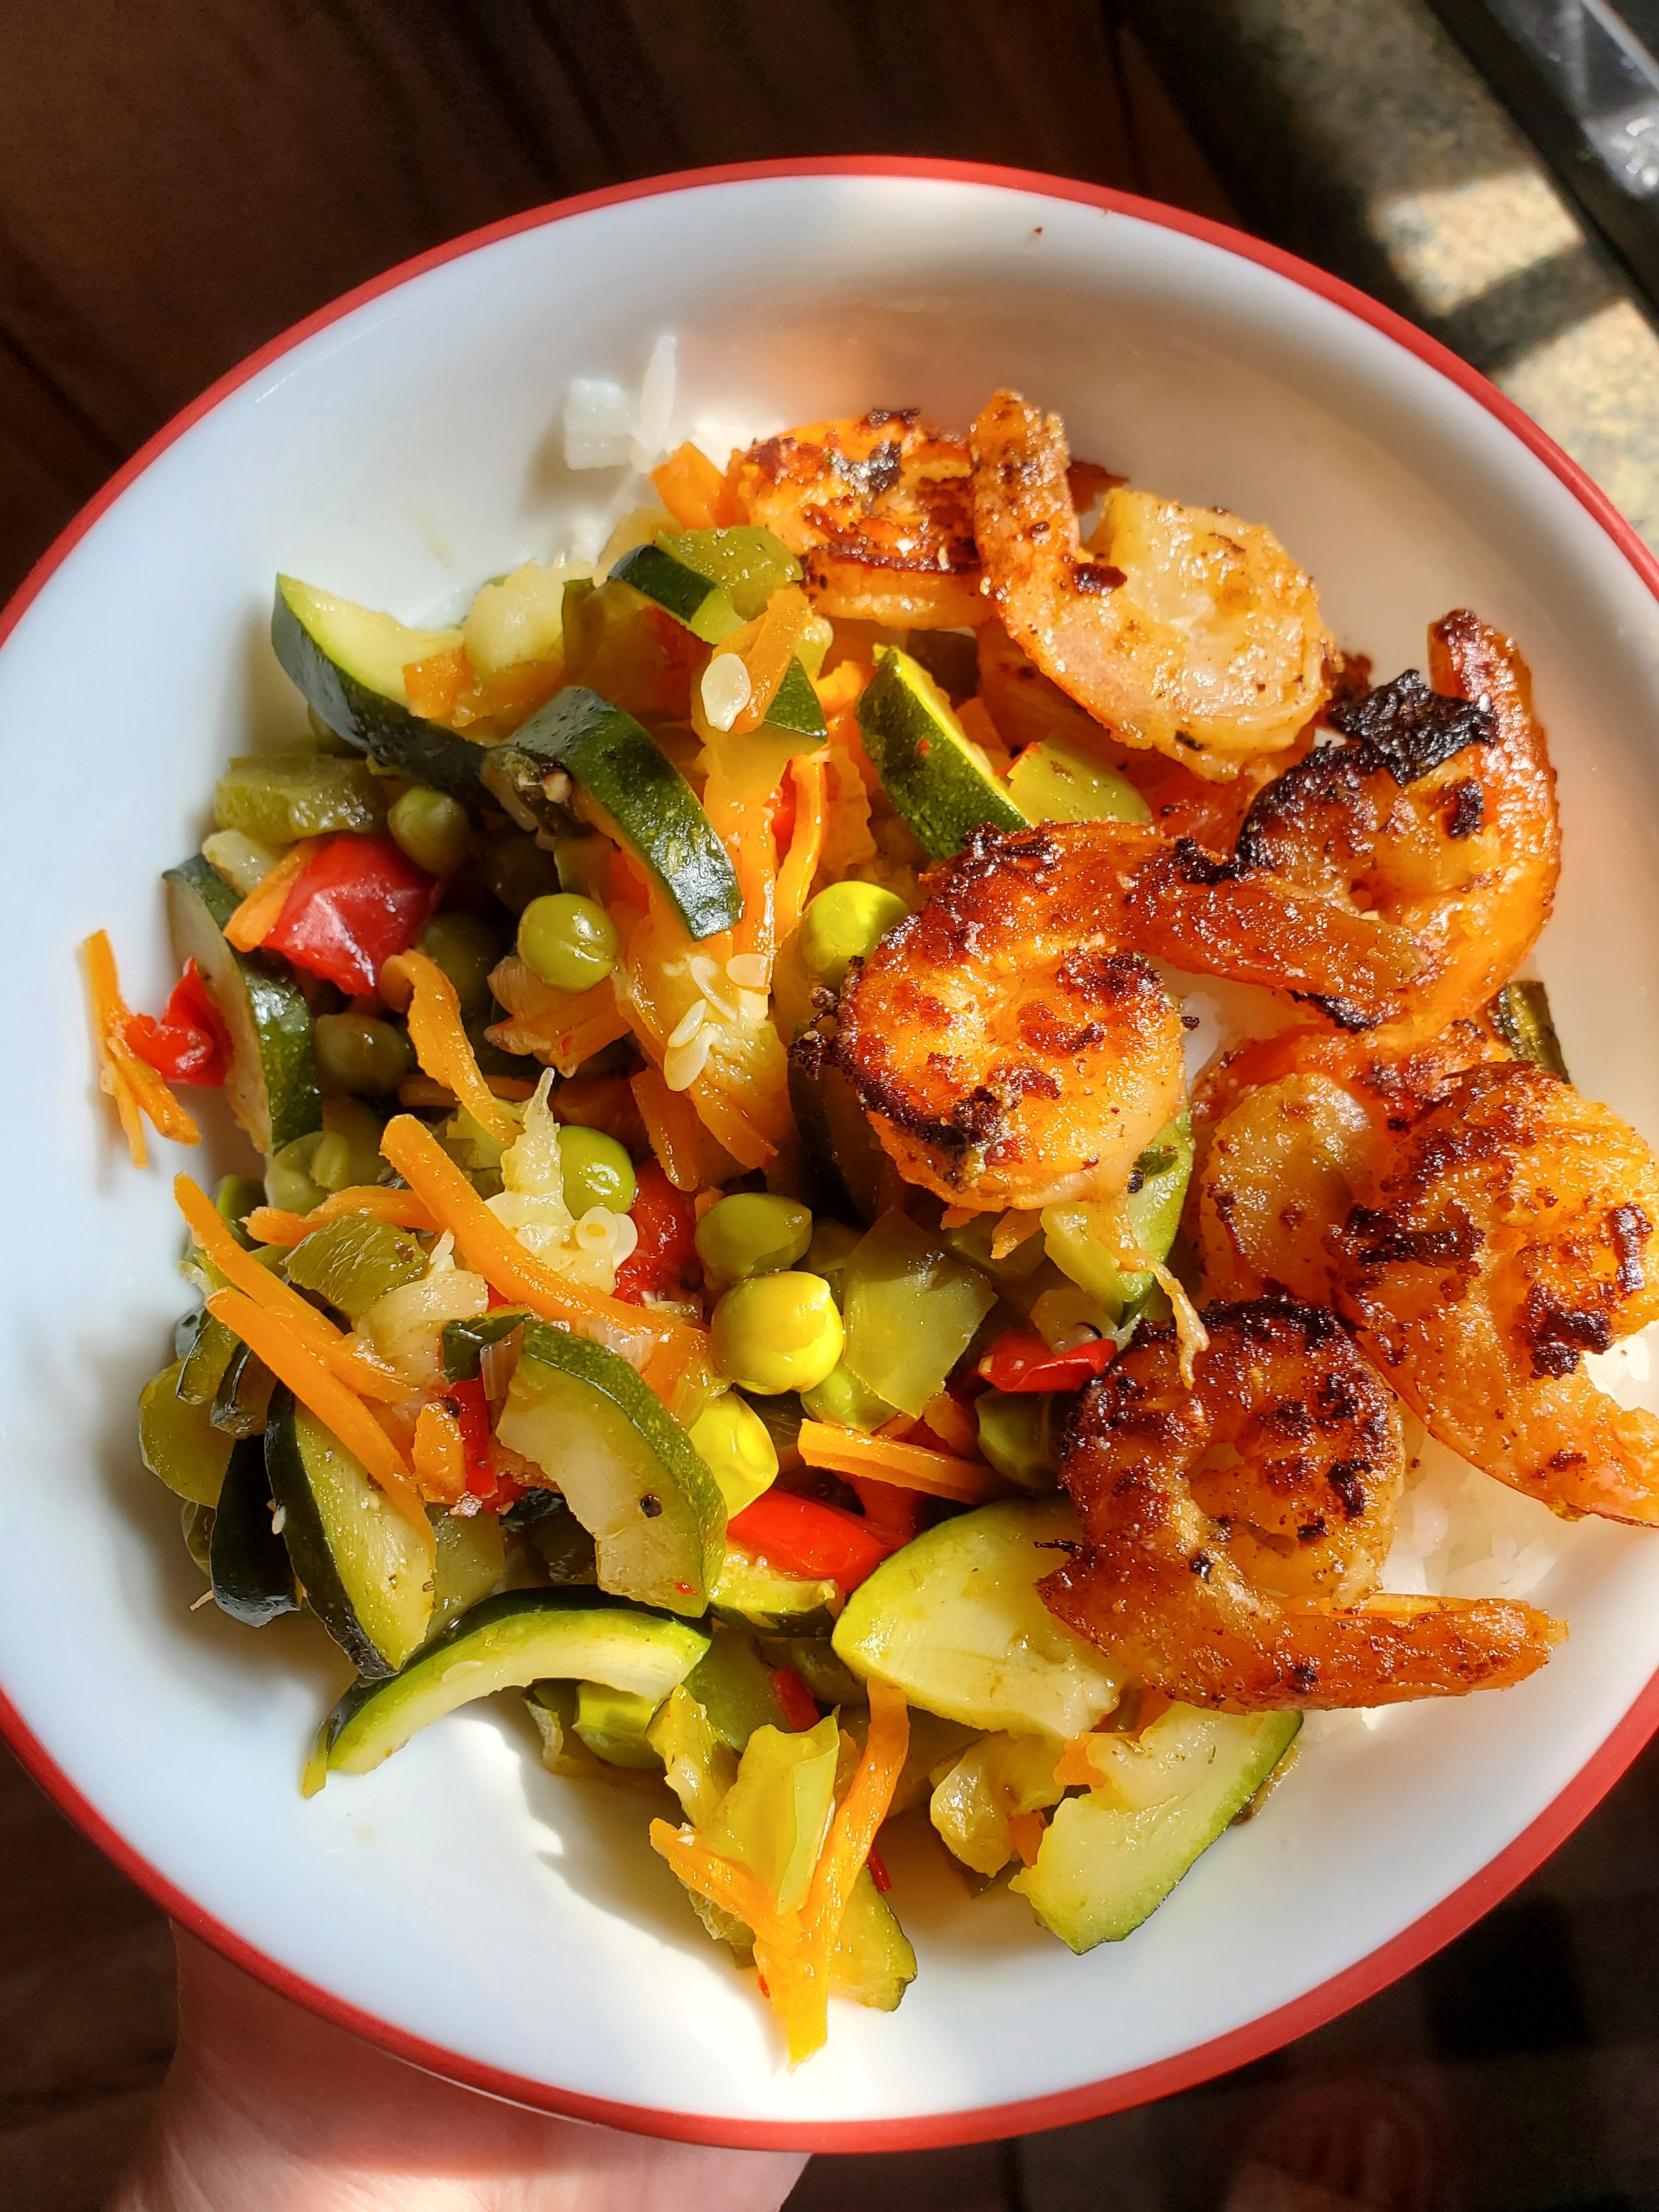
We think the shrimp is best served over rice with a great big pile of mixed veggies, but it also works with a salad or pasta. Get creative with it - maybe it's a good sandwich filling or a stellar appetizer, too. We just haven't tried it all yet.

 Thanks for checking out our recipe this week! Let us know on our Facebook how it turned out for you!


And remember, if something is going on with any of your appliances  we want to help. Whether it’s some of our posts here on the site, or needing a trained technician to take a look, Appliance Rescue Service is here for you.

Lets Talk Turkey In EVERY Method

Yeah, we know it's overdone, but how often do we get to use such a fowl pun?

Cooking methods

  • Slow Cookers (breast or small roast)

  • Instant Pot (breast)

  • Air Fryer (breast)

  • Convection Oven (whole turkey)

  • Traditional Oven (whole turkey)

  • Deep Fry (whole turkey)


Have you ever wondered what the differences were in how to cook a turkey in your kitchen? We did. So we took all the different ways we could think of and tried them out.

Before The Cooking Begins

Before you start cooking your turkey, we advise taking a few steps. First off, how much turkey do you actually need? Are you doing a whole turkey? A small one? A large one? What about just getting pre-sliced turkey? (For those of you that are skipping the turkey altogether, we aren't really sure we can help with that. At least not in this post.) Unless you're looking at doing a turkey eating contest, estimate roughly 1 lb of turkey per person at your gathering. So if you've got 20 people, get a twenty-pound bird.  If you want to be able to make all sorts of delicious leftovers, estimate at roughly 1.5 pounds of bird per person. 


Thawing a frozen turkey isn't actually that difficult. What matters is that you plan for it leading up to the day you intend to cook the bird. There are three methods you can go about thawing it, depending on the size of your bird. For all of these, we advise making sure the bird is still fully wrapped in order to prevent the spread of germs.  You can thaw it in the fridge for several days prior to Thanksgiving. You can thaw it in the sink, changing out the water every two hours or so. You don't want hot water for this or else the turkey will start to cook. Instead, shoot for lukewarm to slightly cool. Your third option is to use your bathtub as an oversized sink, in the event that you have a very large bird or you're cooking multiple different turkeys. For this one, we strongly advise bleaching and scrubbing the tub both before and after you use it. Again, keep your water lukewarm to slightly cool. The good news is that you won't have to change the water during the thawing process. 


Once you've got a fully thawed bird, it's time to remove the giblets. These are going to be the various organs from the bird. Sometimes they'll be bound together into a small bag, other times you'll need to remove the pieces from either the interior of the turkey or from the neck. You can save or toss these as you prefer. We think they're great for stocks and gravies.  Now pat the turkey dry inside and out with paper towels and set it aside for the time being. 


Now that we've gone through the uniform bits of preparing your turkey, it's time to consider the different ways you might want to cook it. (Admittedly we hope that you'll read the whole article prior to doing the prep, but it is up to you.) 


Slow Cooking That Turkey 

If you're looking at a small bird or a turkey breast, a slow cooker is a  great way to go. You should be able to feed about 8 people with one slow cooker, depending on the size you have. You'll want to mix together the seasonings you intend for the turkey along with water in order to give the turkey plenty to soak up. You can also use different soup mixes if you want to get creative.  One that we've seen suggest is actually French onion soup, or an au jus mix. Your cooking time for this should be about 6-8 hours on low. To check for doneness you're wanting the internal temperature to be 155-160. We know it's supposed to be about 165-170 but, your turkey is going to continue heating after you remove it from the oven. So, look for that temperature, that the turkey has soaked up the juices and the meat is tender. 

A slow cooker is going to result in very juicy, tender meat.


Instant Pot, Instant Turkey? 

Now, the instant pot is obviously not going to fit the entire turkey. For that reason, you're better off using a turkey breast in there rather than trying to figure out if you can fit the whole bird in there. Again, this is going to be a very good for a family gathering  8 or less. Start by putting oil on your turkey. Pat or rub it down, rather than just pouring it on. You can use any oil you find is tastiest, but we suggest either sunflower or olive oils. Now rub on your spice mix of choice. 

With all of that done, pour roughly 1/4 cup of water into the instant pot alongside the turkey breast. Now start the pressure cooker for 25 minutes and use the time for doing something else. When the time is up wait for the full pressure release and allow the turkey breast to rest for 10-15 minutes before you start carving. 

Using an Instant Pot for your turkey is still going to give you a very juicy meal, but it’s not going to be as tender as the slow cooker. 


Air Fryer... for a Turkey? 

We don't quite get why you might want to fry your turkey, but hey, an air fryer might make it slightly healthier? Slightly? Eh, we don't judge. This is still an entirely valid method of making a turkey whether it's just for you or if you're looking to do custom spice blends for different family members. 

These are ideal for 1-2 people at 1-2 pounds of turkey breast. Start by rubbing down your turkey with the spices of choice. Be generous with them and really coat the outside of the turkey.  Put it in for 30-35 minutes at 390*F. Once again you're aiming for an internal temperature of 160*F, but you're not going to have much in the way of continued cooking once you take it out.  Once the air fryer is done, take out the turkey, plate it up and let it sit for 15 minutes before you dig in. 

We’ll point out that this is for using our method. You might have different results if you try a different route or add other elements to the recipe. For this turkey though you’re going to end up with nice, crispy skin with a fairly standard poultry texture to the meat. 


Convection Oven 

A convection oven is much larger than anything we've dealt with up till now. What that means is that you can get creative! You can cook a whole turkey, you can cook several different 'cuts' of turkey or you can do several different varieties of just say turkey breasts. It's up to you,  Fortunately, you can also go back to the 1 lb of bird per person rule, without having to worry that you'll have to do multiple rotations of cooking to feed everyone. 

 Start off by preheating your oven to 350*. Now move your bird over to the roasting pan and grab your favorite spice mix and some oil. Again, you can use whatever type you prefer, we like sunflower because it doesn't add anything to the taste of the bird. Once you've rubbed down the bird with oil, rub in the spice mix you've chosen. Depending on the spices in question you might for a light coating or decide to add a really solid crust to the bird. Once you've got your turkey prepped, it's time to toss it into the oven for 2 - 2.5 hours. You can baste it using the juices or some chicken broth during the process, or you can choose to leave it alone. Either way, you're going to want to use a thermometer to check the temperature of the thigh to figure out when the bird is done. Once the thigh has reached 180* internally, you're good to go. Again we advise letting the bird rest for 15-20 minutes prior to carving it up in order to seal in the flavor. 

At some point you’ve likely had a turkey cooked in a traditional electric or gas oven, this is going to give you a very similar result, although the skin should be slightly crispier. It’s going to still be more tender than a chicken though. 


Traditional Oven….We’ve got nothing for this one. (Leave your suggestions in the comments!)   

Much like the convection oven, you can cook everything up to a whole bird with your traditional oven. You're really only limited by the size of the turkey compared to the internal space of the oven. It's great! Make sure to do a comparison beforehand this way you don't end up with more bird than your oven can handle.  Once again we're sticking with the 1lb of turkey per person, or 1.5 lb if you're wanting to send people home with leftovers. 

This time you'll be preheating your oven to 325*, a lower temperature to allow the turkey to stay nice and juicy. Move the turkey over to the roasting pan and grab your oil and spices. Rub in the oil and then crust your bird to your desired level of spices. We think a nice thick pepper crust is a great way to do a turkey. Once you've done that, grab some tin foil and make a tent for your turkey. You don't need it just yet, but you'll want to ensure that the turkey doesn't end up burning in the last half hour to an hour of cook time. Set that aside for now and pop the turkey into the oven. 


Once again you want to use the thickest part of the thigh to see if the turkey is done. This time you're looking for a range between 165 & 180 when it's done. A good technique to use is to cook the turkey for two hours, check it and if it's not hot enough at that point, to baste it, close it back up and set it for another thirty minutes.  Once the skin has turned a golden brown, that's the point when you put the tin foil over top of the turkey. Make sure that you're not closing the sides, you still want the air to flow through and for the bird to cook. 


When it's done, remove the turkey from the oven and allow it to sit for 10-15 minutes. 

A traditional oven-roasted turkey is going to result in the most ‘traditional’ flavor. It’s going to be juicy if you treat it right, and the skin is going to be softer than the convection oven. 

Deep Frying The Turkey -

 When you want the really  crispy skin 

We're going to start off this section with a warning. Please read all instructions thoroughly before you do this.  It's a wonderful method for cooking turkey we know, but every year hundreds of people end up injured and at least 1,000 fires are started. It's a delicious way to cook the turkey, but we want all of you to be safe as well. 

You're going to want to use a turkey that's between 10 and 20 pounds for this. Make sure that your turkey is completely thawed before you even consider filling the pot.  Once you've guaranteed that, place the turkey into the pot and fill the pot with water.  Fill up until the water is one inch below the top of the turkey. That's the line you're going to want to go to when you fill the pot with oil later. If you fill the pot over the top of the turkey your pot is likely to boil over during the cooking process.   If your pot cannot hold all of this, you do not have the right size pot. Please consider a different method of cooking. 

If you do, remove the turkey and pat both it and the pot dry.  Back to the turkey, grab your spices or marinades, and cover your turkey. Now grab some butcher's twine and tie the legs of the turkey together and attach those to the stand that came with the fry pot.  Once you've got the turkey and the stand situated into the pot, fill the pot with oil up to the line you noted earlier.  We suggest using oil with a high smoke point like canola, corn or soybean.  Grab the thermometer that came with the pot and attach that to the fryer. Bring up the heat slowly to 350* F. 

Once you have your oil at 350, slowly and carefully raise and lower the turkey several times in the oil to seal the juices into it. We suggest 3-4. It's going to be a messy process so gloves and an apron might be useful.  Once you've sealed the turkey, lower it back into the oil and leave it there. You're going to want to cook it for 3 minutes per pound of turkey. So if you've got a 10-pound turkey you're looking at 30 minutes of cooking time. Not bad in comparison to the other methods. 

When you're checking for doneness, again look to the thickest part of the thigh. This time you want an internal temperature of roughly 180* to 190* F. Make sure to slowly and gently lift the turkey out of the oil so you don't get splashed. 

Let the turkey rest for 10-20 minutes before carving. While you're waiting on that, go back to your fryer and turn off the heat.  Now cordon off where you have it for the next three hours at minimum before you try to move the pot or dispose of the oil. After that point, you can carefully check to see if it's cool, and if not, leave it alone for another hour. 


This is the method to use if you really like your crunch. The skin is very ‘crispy crunchy’ without being burnt or charred. The meat isn’t as tender as other methods, but that’s sort of the point? 


Although we've given you the basics on how to do this, we do also advise this article from Butterball for a more in-depth article. (How To Deep Fry A Turkey | Butterball®)


So, what do you think? What's your favorite method of years past for cooking a turkey? Are you going to try something new this year? Let us know in the comments below or over on our Facebook page, we always love to hear from you! 


If you've ended up here because you tried to clean your oven prior to the big meal and found out that your oven devoured itself, it's ok. We can help. Give us a call at ((214) 599-0055) or send us a message through our contact page and we'll be happy to help.


Additional Reading 

Self Cleaning Ovens

How To Prepare Your Kitchen For the Holidays


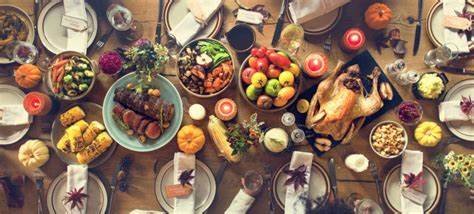
That is a delicious looking spread, and it’s definitely a traditionally roasted turkey. It’s harder than you might think to find good photos of the other methods of cooking.

Slow Fast Food

Buffing up your lunch to turn it into a meal you’ll look forward to.


Do you ever get sick of pulling out your lunch and having it the same as several of your other coworkers? This week we're showing you how to start off with a basic cup of ramen, or other similar cup of Asian noodles and turn it into a proper meal. This should probably be done the night before, although if you get up early enough, you don't have to. If you add enough vegetables, you can also turn one cup of noodles into two separate meals. 


This recipe is meant to buff up a single cup of ramen or other Asian noodle fast foods. If you want to just feed yourself, think about each vegetable in the list as "how much of this can I eat in one sitting" rather than "what exact amount do I need." 


Ingredients: 


Ramen (cup)

Canned Meat (chicken or pork works best, but you can make other varieties too!) 

carrots

chives

celery 

onion 

cabbage (Napa if possible) 

baby spinach

mushrooms 

garlic 

Sesame oil (or vegetable oil if you don't have any) 

hard boiled eggs

Seaweed for garnish


Sauce Options

Sriracha

Hoisin sauce

Fish sauce

Peanut sauce 


Start with your cup of noodles. Admire the foam cup. Now set it aside. You're not going to need that 'til the very end. 

Now, let's go back over to your ingredients. Start by chopping up your vegetables. 

The point here is to get your veggies into sizes that are going to give your ramen different textures and layers. 

For the carrots, you'll want to either slice them like matchsticks or on a diagonal into thin layers. 

For the chives, you'll want cut them into slices, no more than 1/4 inch in length. 

Moving on to celery, this one is up to preference. You can do a fine chop and just use it for garnish, or you can slice them diagonally into chunks about 1/2" in length.

Next up is your onion. Again, this is up to preference. We like to go for strips rather than cubes because it adds more flavor and texture. However, you also have the option to dice them into chunks and just use them to flavor the ramen. 

Moving on to cabbage and baby spinach. For both of these shredding them is the best way to go, and both options work. 

Mushrooms, depending on the variety, have all sorts of options, based on the texture you want. We like to leave them whole, but you can dice them, turn them into chunks or matchsticks, whatever you like. 

Now that you're done with your vegetables, go ahead and mince your garlic. 


Heat a pan and toss in about one tablespoon of oil. Bring it up to medium heat and toss in your carrots and garlic. Once your carrots have begun to soften, add in the onion and the mushrooms. Your onions will be your unofficial guide for when to move on to the next step. You want to wait until the onions are partially translucent, and then add in the cabbage, spinach, chives and celery. At this point, turn the heat up and stir constantly. Keep the vegetables moving as you work them around. You can also add in any spices you want. A good place to start is white pepper and sea salt. Once your vegetables are fully cooked, go ahead and turn off the heat. Set the pan to the side.


Now heat up some water and make the packaged ramen. While that is cooking, pull out the can of chicken or pork or whatever other protein you chose and crack that open. Make sure to remove any fats or liquids that naturally come about from the canning process (a quick rinse can also help if the meat tastes too much like the can it's been housed in). Use a fork to shred the meat, but don't remove it from the can just yet. 


Once your ramen is done cooking (usually about four minutes), dump it into a bowl and add all of your cooked veggies and the meat.  Toss in some sauce if you'd like, and garnish with some of that seaweed you totally didn't buy just for this recipe. Mix well and plate it up, for you or any other adventurous eaters. 


Now that you have the basic concept, take a look at the produce section next time you go to grocery store. What vegetables do they have that you could add in? Do they have any meats or seasonings that you could add to yours to make the dish taste better? It's fun to keep an eye out as you go through the store to see what combinations you can come up with, it also keeps lunch fresh and interesting. 


We hope you enjoyed this week's recipe, and that if you do try it, you'll let us know in the comments below or over on our Facebook page. 


Don't forget that we're not just looking out for your meals. We also want to look out for your home. In the event you need something fixed, or if you're just interested in regular maintenance for your appliances, ARS wants to be there for you. Whether you're in The Colony or Coppell, we aim to be the best appliance rescue service for you and your home.  You can always call us at ((214) 599-0055) or get hold of us via our website.

Chinese noodles with meat,  carrots, peas, peppers mushrooms and spices


Easter Feasts From Around The Globe

As promised, this weekend we are checking out Easter feats from around the World! Even if Easter isn’t something you celebrate, join us anyway! After all, everyone loves food! We’ll be travelling all over the world for this post so grab you notebook and buckle in. 

To make things easier on your poor pilot this weekend, we’re going alphabetically down our list.

Feel free to click any of the sections below to skip around.

Argentina

Bermuda

Brazil

Bulgaria

Colombia

Czech Republic

Denmark

England

Ecuador

France

Germany

Greece

Italy

Mexico

Netherlands

Norway

Poland

South Africa

Spain

Sweden


Argentina

 First up is a quick stop in Argentina. 

In the traditionally Roman Catholic country, even the well known empanadas are given a makeover for Lent. Called empanadas de vigilia the usual fillings of chicken or meat are swapped out for tuna, white fish, or a  mix of blue cheese and walnut. From Argentina with Love has shared a delicious recipe for these that we had to try out! 


After the period of Lent has ended though , everyone wants to celebrate! This means gathering around with all of your family and friends invited for a barbecue, which the Argentinas call an asado. There’s lamb, chicken, beef, chorizo and all the malbec you could want. There’s also homemade chocolate eggs, although that tradition is sadly waning with time.  

Argentina- Empanadas with Roquefort.jpg
 
Bermuda- cod fish cakes.png

Bermuda

When you go to Bermuda for Easter, there are two big traditions, when it comes sto food at least. Cod fishcakes and hot cross buns.  It’s customary to have the fishcakes before you go off to church on Easter Sunday. The former is thought to have arisen from an old superstition that your home would burn down if you didn’t eat one. (If you are from Bermuda, please let us know more about this one in the comments? We are curious!)  The Bermudian has an amazing recipe for cod fishcakes, as well as other Good Friday traditions over on their blog.


Brazil 

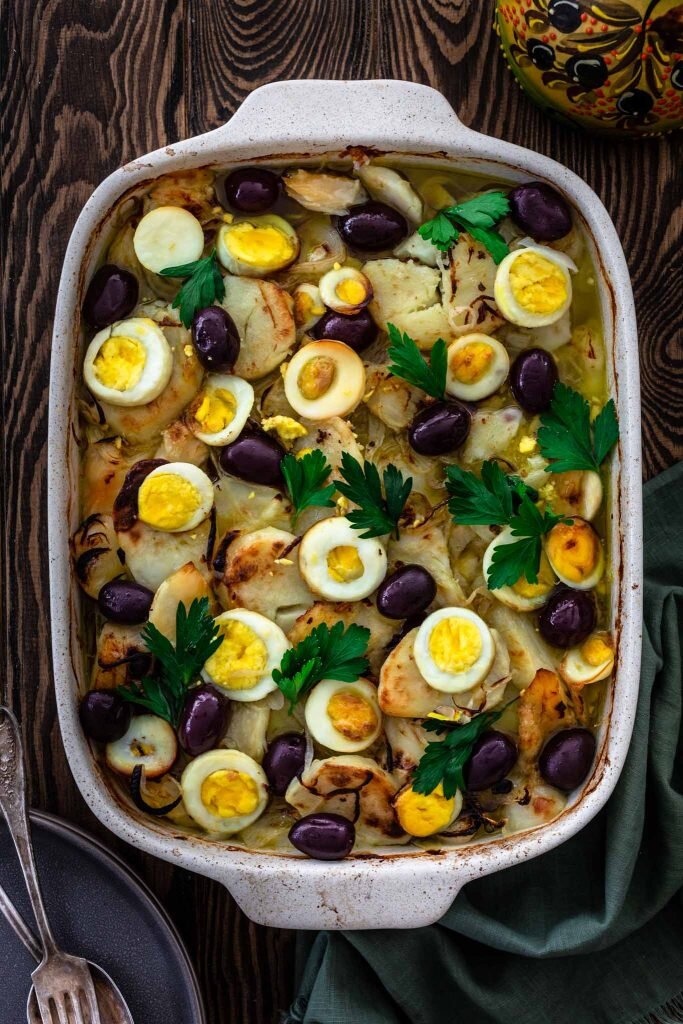
While this recipe initially came from Portugal, it has become an Easter tradition in Brazil. Called Bacalhau, or salt cod, it is to Brazilians and Good Friday what ham is to Americans on Easter Sunday.  While the salted cod is eaten year round, at Easter it is paired with wine, which is special for a country that usually opts for beer. Check out this recipe over at Oliva’s Cuisine to try it for yourself. 

Brazil - bacalhau-a-gomes-de-sa.jpg
 

Bulgaria 

One of the most popular traditions of Easter week in Bulgaria is the making and eating of the braided loaf kozunak. This sweet loaf is made with the juice and zest of a lemon and rum soaked raisins. On Easter Sunday the kozunak takes center stage along with a feast of all the other foods prohibited during Lent. For an absolutely amazing recipe and step by step photos check out the link for Viktoria’s Table.


Colombia 


Easter both is and isn’t a large holiday in Colombia. On one hand, the entire country shuts down for Maundy Thursday and Good Friday.  On the other hand, events, feasts and the exchange of sweets aren’t much of a thing there. There is one traditional meal though and that is  potaje de la vigilia . This recipe is closer to its roots in Castille, but the recipe is still similar. The Happy Foodie has a lovely recipe for it.

 
Czech - Beranek.jpg
 

Czech Republic

While this baked lamb is the cutest recipe on here, the story behind it comes from ingenuity, making it even more special. Many times it wouldn’t be possible in the Czech Republic to get hold of lamb for the Easter meal, and so families would bake this  sweet bread in its place.

Go see the recipe for it over at Gourmetpedia.


Denmark

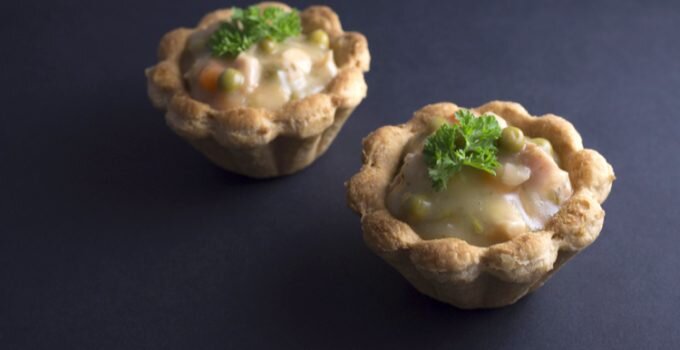
If you get the chance to go to a Danish Easter feast, you’ll find roast meats and herring paired with sliced cheeses and meats.  Most people pair schnaps and beer with the meal, although the breweries make a special Easter beer that is stronger than normal. You’ll also find these delicious tarteletters which are pastry shells filled with chicken and asparagus. We found the recipe for them over at Gourmand Trotter.

Denmark -Tartelette Danish chicken and asparagus tarts
 
England - Simnel cake with 11 marzipan balls

England 

Next up, England! Here the traditional feast is similar to others we’ve encountered, centering around roasted lamb at the center. The dessert is what we’re here for though, which is the delicious simmel cake. It’s a fruit cake that is covered over with a layer of marzipan and 11 marzipan balls to represent the 11 faithful apostles of Jesus.

Our recipe for this one comes right from the BBC where you can learn even more of the history behind this tasty cake.


Ecuador 

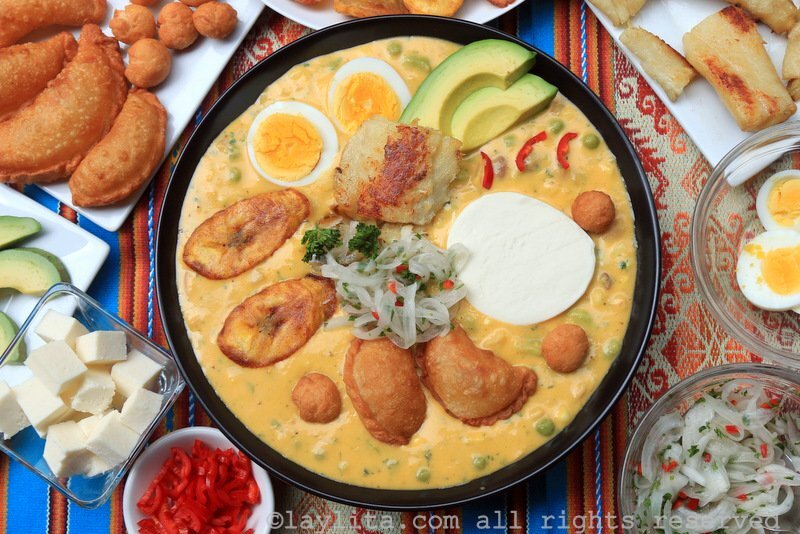
If we hop over to Ecuador, we’ll find another soup for our feast called Fanesca. Made from cod, beans and squash the soup originally came from Spain. The Ecuadorians have made it their own though by mixing in local ingredients  like hot peppers and Andean grains not to be found in the original recipes.

You can find this delicious looking recipe over at Laylita.

Ecuador - Fanesca.jpg
 

France 

Heading back to Europe we find France where instead of the Easter Bunny they have the blessed bells. Church bells ring every day of the year in France, except for the three days of Easter. During these three days, as legend holds, they are making a trip to Rome to be blessed. On Easter Sunday the bells make their return and tour the country leaving chocolate eggs and other treats in gardens all over.  A traditional luncheon meal is Pate de Paques Berrichon, which while delicious is also equally simple to make. A dough wrapped around meat and eggs then baked, and you have a delicious lunch and handy lunch. 


Finland 

If you go up to Finland you can try out their bread pudding that’s only made for Easter, Mämmi. It’s a soft and chilled rye flour ‘cake’ that’s made with orange zest and dark molasses then served with milk or cream.  Check out the Finnish Food Girl to learn how to make this delicious treat.


Finland - mammi.jpg
 
Germany - Seven herb soup.jpg

Germany  

Although this is technically eaten on Gründonnerstag or ‘green Thursday’ before Easter Sunday, we found this recipe so interesting we had to share.  Called Seven Herb Soup, this is just one of many entirely green dishes that Germans consume on this day. Go over to Curious Cuisiniere to learn how to make your own. 


Greece

 If you’re going to Greece, you have to start your Easter feast with Magiritsa, a special soup made from lamb, dill, lettuce and onion, served in an egg and lemon juice broth. My Greek Dish has an amazing recipe on their blog. 

Greece - Magiritsa stew of  lamb
 
Italy - torta-pasqualina-easter-pie-egg.jpg

Italy  

Heading over to Italy, if seeing all of the bread arches doesn’t make you hungry, the smell of this Torta Pasqualina will. Filled with eggs, herbs and cheese, this is a dish that is sure to fill you up.  Check out how to make it over at Eataly. You can also try out the famous dove-shaped cake called colomba pasquale.


Mexico

If you make it to Mexico on Good Friday, be prepared to try out their capirotada. A sweet bread pudding that’s covered in a sugary syrup with fruits, berries, nuts and cheese, this isn’t something to be missed. Make sure that you have plenty of room for this delicious treat as you won’t want to eat anything else after you’ve had it. You can find a recipe for it over at Muy Bueno Cookbook. 

Mexico -capirotada.jpg
 
Netherlands - Paasstol.jpg
 

Netherlands

In the cold and dark of the Netherlands, family and food are what bring people together and light to our hearts before spring (finally) comes.  This means many enriched breads and pastries including paasstol. A tasty, fruity loaf that’s filled with an almond paste center it’s not to be missed. They also serve braided loaves, pumpernickel, egg cakes and jodenkoeken or buttery shortbread. Alongside these are pats of butter mouled into animal shapes, cheeses and smoked fish.  Over at In My Red Kitchen you can find a fantastic recipe for paasstol.


Norway  

Going to Norway now, a traditional Easter table is laid out with lamb, eggs, cakes, yeasted breads and more oranges than you know what to do with. The tradition of eating oranges, according to some, dates back to the when merchant ships would have brought the first of the harvest from Southern Europe during Easter. Over at Thanks For The Food, they have a traditional Easter orange cake that you can check out.

Norway - Orange cake.jpg
 

Poland 

On to Poland, to try out their White Sausage or Biala Kielbasa. This traditional meal is surrounded on the table  by rye soup, cakes with poppy seeds or cottage cheese and a very special centerpiece. A loaf of butter that has been shaped into a lamb with peppercorns for the eyes and a red bow around its neck. If you want to try out making your own Biala Kielbasa, head over to Polish Your Kitchen for their recipe.


South Africa 

Going down to South Africa, we find a very interesting take on ‘no meat for Lent.’  Here they enjoy pickled fish. Their version here is lightly curried served with onions and fresh bread.  

While pickled fish is enjoyed the world over, the South African method is unique to them. It starts with frying portions of fish that have been seasoned with salt and pepper. Separately they’ll cook a mix of onions,  and spices before adding vinegar and sugar. This mixture is then poured over the cooked fish where it is allowed to refrigerate for at least 24 hours. 

After this time has passed the fish  has achieved a delicious, sweet and tangy flavor. My Anos Kitchen has a recipe so that you can try this amazing dish for yourself.

South Africa- Pickled Fish.jpg
 
Spain -Three different Torrijas covered in milk chocolate, powdered sugar, and honey
 

Spain

Our second to last stop is Spain, to test out their Spanish Toast or  torrijas. Similar to French toast, it’s made from thick slices of bread that are soaked in milk and a beaten egg, then fried in olive oil. It’s served cool and paired with honey, powdered sugar or coated in  milk chocolate. Spanish Abores shared a recipe that she had found after her time teaching in Spain and mentions adding cardamom to the mix. Our own encounters with cardamom lead us to agree, this spice would really make your Easter dish sing. 


Sweden 

The final stop on our journey, Sweden! While many people talk about pickled herring or salmon at Easter, there is another very popular dish that we found on the country’s own website. Called Janssons Frestelse or Jansson’s Temptation, this is a creamy casserole made with potatoes, onions and anchovies. It’s usually washed down with a glass or two of aquavit. 

Sweden - Janssons Temptation a potato casserole
 

Thank you very much for checking out this journey with us! We hope that you learned something new or found a recipe to try. 

If you did, let us know over on our Facebook page? And if we missed anything, tell us that too! 

Or, if one of your appliances is acting strange, or outright broken, please give us a call. We want to help you and yours. Reach out to us by phone ((NUMBER HERE)), or you can schedule an appointment over here. ((INSERT LINK)) 

Thank you again for joining us and we hope to see you in two weeks time,  when we’ll be checking out a recipe for Soaked or Sprouted Chickpea Falafel. We look forward to seeing you then!

All  credit for photos belongs to the amazing bloggers who created our recipes this week.